Introduction
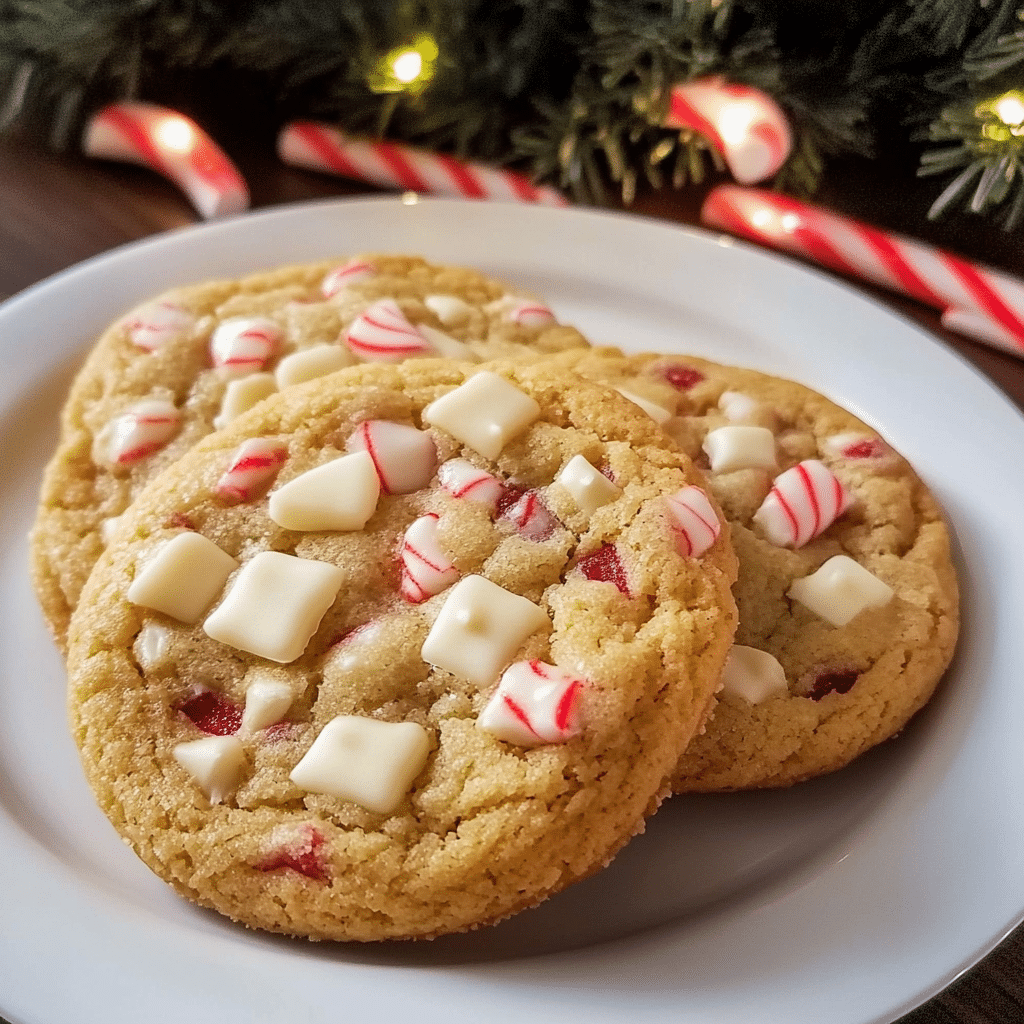
There’s something magical about the holidays, and it’s not just the twinkling lights or the cozy sweaters (though those are pretty amazing too!). For me, it’s the aroma of fresh cookies wafting through the kitchen, the kind that instantly fill the room with warmth and comfort. These White Chocolate Candy Cane Cookies do just that! They’re a perfect blend of creamy white chocolate and the refreshing crunch of candy canes, making them the ultimate festive treat.
What makes these cookies so special? First off, they’re incredibly easy to make, even if you’re a newbie in the kitchen. And second, they’re the ideal mix of sweet, minty, and creamy with just the right amount of crunch. I can almost taste the blend of flavors just thinking about it—the smooth white chocolate melts in your mouth, and then you get that delightful bite of crushed candy canes. It’s truly a match made in holiday heaven.
But beyond the taste, these cookies hold a special place in my heart because they’ve become a family tradition. Every year, my family gathers around the kitchen, rolling out dough and crushing candy canes. It’s one of those activities that makes memories, and I’m excited to share this recipe with you so you can create your own delicious holiday moments.
Why You’ll Love This Recipe
You’ll fall in love with these cookies for so many reasons. Here’s why:
- Easy to make: If you’ve ever been intimidated by baking cookies, this recipe is for you! With just a handful of ingredients and simple steps, you’ll have a batch of cookies in no time.
- Perfect for the holidays: The candy cane crunch and the creamy white chocolate make these cookies feel extra festive. They’re ideal for holiday parties, cookie exchanges, or just because you want to enjoy something special while watching holiday movies.
- Family-friendly: These cookies are loved by both kids and adults, so you can bake them for your family or share them with friends.
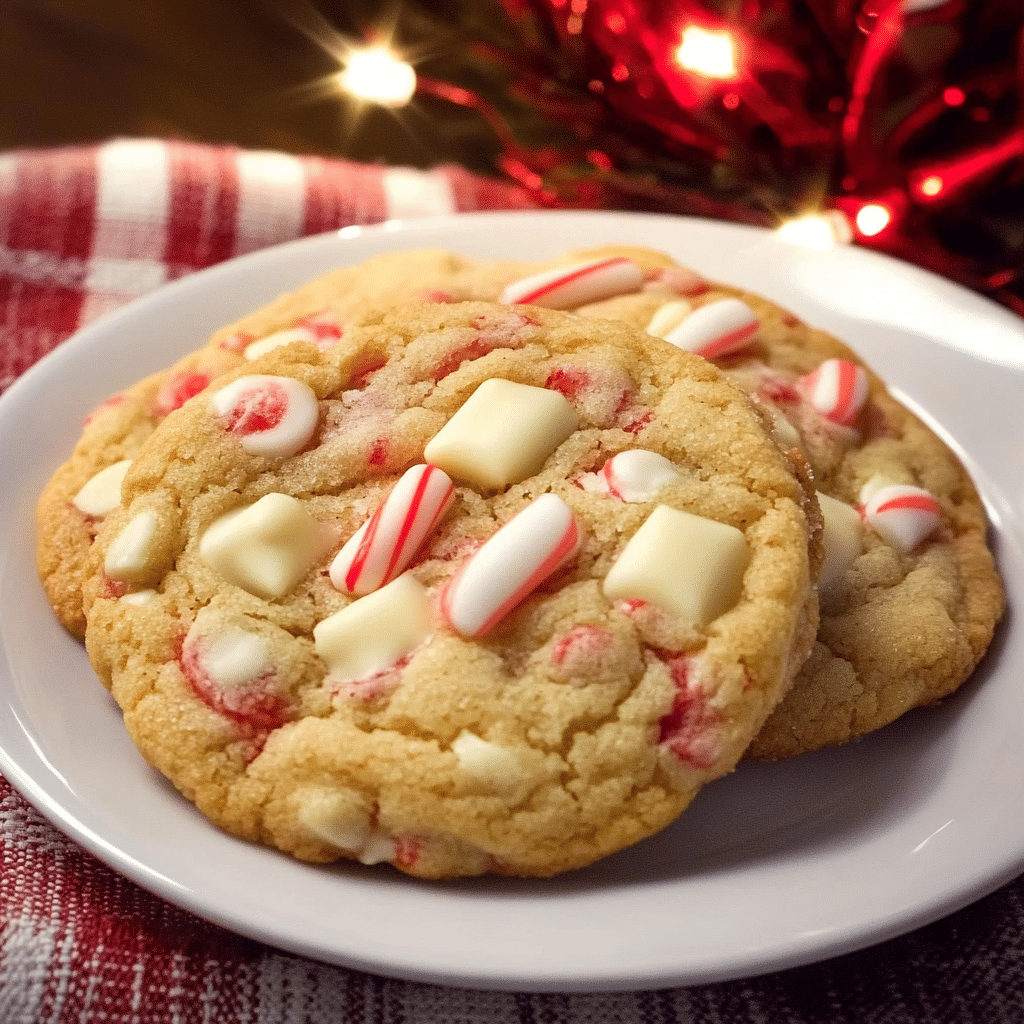
- Satisfying texture: The chewy cookie base paired with crunchy candy cane pieces and smooth white chocolate creates a delightful contrast in every bite.
Let’s dive into making these delicious treats!
Preparation Time and Servings
- Prep Time: 15 minutes
- Cook Time: 10-12 minutes
- Total Time: 30 minutes
- Servings: Makes about 24 cookies
Nutrition Facts
- Calories per serving: 150
- Fat: 8g
- Carbohydrates: 21g
- Protein: 1g
- Sugar: 16g
These cookies are definitely a sweet indulgence, but with every bite, you’ll understand why they’re worth it!
Ingredients
For these White Chocolate Candy Cane Cookies, you’ll need a few simple ingredients that come together to create magic. Here’s what you’ll need:
- 1 ½ cups all-purpose flour
- 1 teaspoon baking soda
- ½ teaspoon salt
- 1 cup unsalted butter, softened
- ¾ cup white sugar
- ½ cup packed brown sugar
- 2 teaspoons vanilla extract
- 1 large egg
- 1 ½ cups white chocolate chips
- ½ cup crushed candy canes (about 4-5 candy canes)
- Optional: extra candy cane pieces for topping
Why These Ingredients Matter
- Butter: The unsalted butter is key to creating a rich, chewy cookie. It helps the dough come together beautifully, giving the cookies a melt-in-your-mouth texture.
- White Chocolate Chips: These are the star of the show! They add sweetness and creaminess to the cookies and pair perfectly with the candy canes.
- Candy Canes: The crushed candy canes add a holiday touch and that refreshing minty flavor that makes these cookies feel so festive.
- Vanilla Extract: A dash of vanilla brings depth and warmth to the flavor profile of the cookies.
Step-by-Step Instructions
1. Preheat Your Oven and Prepare Your Baking Sheets
Start by preheating your oven to 350°F (175°C). Then, line two baking sheets with parchment paper or silicone baking mats. This will prevent the cookies from sticking and help them bake evenly.
2. Whisk the Dry Ingredients Together
In a medium bowl, whisk together the all-purpose flour, baking soda, and salt. Set this aside for now. Whisking the dry ingredients together helps evenly distribute the baking soda and salt, ensuring your cookies bake properly.
3. Cream the Butter and Sugars
In a large mixing bowl, cream together the softened butter, white sugar, and brown sugar. Use an electric mixer or a whisk to beat the mixture until it’s light and fluffy. This process usually takes about 2-3 minutes. The fluffier the butter and sugar mixture, the softer your cookies will be.
4. Add the Egg and Vanilla Extract
Beat in the egg and vanilla extract until fully incorporated. The egg helps bind the ingredients together, while the vanilla adds that cozy, sweet aroma to your cookies.
5. Gradually Add the Dry Ingredients
Slowly add the flour mixture to the wet ingredients, mixing until just combined. Be careful not to overmix; you want the dough to come together but not become too tough.
6. Fold in the White Chocolate and Crushed Candy Canes
Now comes the fun part! Gently fold in the white chocolate chips and the crushed candy cane pieces. I love the sound of candy canes crunching as they break into little pieces—it’s like the sound of the holidays! The white chocolate chips will melt slightly into the dough, creating creamy pockets of chocolate in every bite.
7. Scoop the Dough
Using a cookie scoop or tablespoon, scoop out portions of dough and roll them into balls. Place them on your prepared baking sheets, spacing them about 2 inches apart. These cookies don’t spread too much, but giving them space ensures they bake evenly.
8. Bake the Cookies
Bake the cookies in your preheated oven for 10-12 minutes or until the edges are golden brown. The centers will still be soft, and that’s okay—these cookies will firm up as they cool. Don’t overbake them; the chewy texture is key!
9. Cool and Add Extra Candy Cane Topping
Once your cookies are out of the oven, let them cool on the baking sheets for 5 minutes. Then, transfer them to a wire rack to cool completely. If you’d like to add an extra holiday touch, you can sprinkle a little more crushed candy cane on top while they’re still warm.
How to Serve
These cookies are perfect for any holiday gathering, but here are a few fun serving ideas:
- Serve with hot cocoa or eggnog for a festive treat that’s even more indulgent.
- Pair with a scoop of vanilla ice cream for a special dessert that’s perfect for family movie night.
- Package them in cute holiday tins and give them as gifts. These cookies make the perfect homemade gift for friends, family, or neighbors.
- Top with a drizzle of melted white chocolate for an extra fancy touch.
Additional Tips
Here are some extra tips to help you bake the perfect batch of White Chocolate Candy Cane Cookies:
- Use room-temperature butter: It makes the creaming process easier and ensures the dough mixes together smoothly.
- Don’t overmix the dough: Overmixing can result in dense cookies, so mix the dough just until combined.
- Crush the candy canes evenly: Use a rolling pin or a food processor to crush the candy canes into small, even pieces. Too large of chunks can make the cookies hard to bite into.
- Chill the dough (optional): If you want your cookies to hold their shape even better, you can chill the dough for 30 minutes before baking.
- Swap the candy canes: If you prefer another holiday flavor, try using crushed peppermint or even a sprinkle of cinnamon sugar for a different twist.
Recipe Variations
Feel free to get creative with this recipe! Here are a few variations to try:
- Gluten-Free: Substitute the all-purpose flour with a gluten-free flour blend. Make sure to check that the candy canes and white chocolate chips are also gluten-free.
- Mint Chocolate Chips: For an extra minty kick, swap some or all of the white chocolate chips for mint chocolate chips. It’ll add a deeper mint flavor that pairs perfectly with the candy canes.
- Add Sprinkles: Make your cookies extra festive by adding some colorful holiday sprinkles on top before baking.
Serving Suggestions
Pair these cookies with any of these holiday favorites:
- Holiday beverages: A warm mug of hot chocolate, spiced apple cider, or even a festive chai latte would go perfectly with these cookies.
- Side dish options: Serve with a simple salad, like arugula with a lemon vinaigrette, to balance the sweetness of the cookies.
- For kids: Serve with a glass of milk and maybe some fruit for a kid-friendly holiday snack.
Freezing and Storage
These cookies are perfect for making ahead and storing for later!
- Storage: Store leftover cookies in an airtight container at room temperature for up to 1 week. They stay chewy and delicious.
- Freezing: To freeze the dough, scoop the dough balls and place them on a baking sheet. Freeze for 1 hour until firm, then transfer to a freezer-safe bag. You can bake the cookies directly from frozen—just add an extra 2-3 minutes to the baking tim
Frequently Asked Questions (FAQ)
1. Can I use regular chocolate chips instead of white chocolate?
Absolutely! While white chocolate adds a creamy, sweet flavor, you can easily swap it out for milk or dark chocolate chips if you prefer. Just keep in mind that it will change the overall flavor of the cookie, but it will still be delicious!
2. How can I make the cookies chewier?
For chewier cookies, you can add a little extra brown sugar to the dough. Brown sugar contains more moisture than white sugar, which helps keep the cookies soft and chewy. Additionally, make sure not to overbake them—pull them out of the oven as soon as the edges are golden and the center is still soft.
3. Can I freeze these cookies?
Yes! These cookies freeze wonderfully. Once baked, allow the cookies to cool completely, then place them in an airtight container or freezer-safe bag. They will stay fresh in the freezer for up to 3 months. When you’re ready to enjoy them, let them thaw at room temperature.
4. How do I crush the candy canes?
You can crush the candy canes using a rolling pin! Just place them in a sealed plastic bag and gently roll over them to break them into small pieces. Alternatively, you can use a food processor for a finer crush. Make sure not to crush them too finely; you want some larger pieces for that perfect candy cane crunch.
5. Can I make these cookies ahead of time?
Yes! You can prepare the cookie dough ahead of time and refrigerate it for up to 48 hours before baking. This can even enhance the flavor of the cookies as it allows the dough to rest and firm up. You can also freeze the dough in balls and bake them directly from frozen—just add a couple of minutes to the baking time.
6. Can I use a sugar substitute?
If you’re looking to reduce sugar, you can try a sugar substitute like stevia or monk fruit. However, these substitutes may alter the texture and flavor of the cookies slightly. I recommend using a 1:1 sugar substitute ratio, but make sure to follow the specific instructions on the product you use for the best results.
7. How do I store these cookies?
Store your cookies in an airtight container at room temperature for up to a week. If you’d like them to last a bit longer, you can freeze them for up to 3 months. Just make sure they are fully cooled before storing.
8. Can I use mini candy canes?
Yes! Mini candy canes are great for adding a little extra crunch and flavor. They also look adorable if you’re using them as decorations. Just crush them and mix them into the dough as you would with regular-sized candy canes.\

White Chocolate Candy Cane Cookies
- Total Time: 30 minutes
Ingredients
- 1 ½ cups all-purpose flour
- 1 teaspoon baking soda
- ½ teaspoon salt
- 1 cup unsalted butter, softened
- ¾ cup white sugar
- ½ cup packed brown sugar
- 2 teaspoons vanilla extract
- 1 large egg
- 1 ½ cups white chocolate chips
- ½ cup crushed candy canes (about 4–5 candy canes)
- Optional: extra candy cane pieces for topping
Instructions
1. Preheat Your Oven and Prepare Your Baking Sheets
Start by preheating your oven to 350°F (175°C). Then, line two baking sheets with parchment paper or silicone baking mats. This will prevent the cookies from sticking and help them bake evenly.
2. Whisk the Dry Ingredients Together
In a medium bowl, whisk together the all-purpose flour, baking soda, and salt. Set this aside for now. Whisking the dry ingredients together helps evenly distribute the baking soda and salt, ensuring your cookies bake properly.
3. Cream the Butter and Sugars
In a large mixing bowl, cream together the softened butter, white sugar, and brown sugar. Use an electric mixer or a whisk to beat the mixture until it’s light and fluffy. This process usually takes about 2-3 minutes. The fluffier the butter and sugar mixture, the softer your cookies will be.
4. Add the Egg and Vanilla Extract
Beat in the egg and vanilla extract until fully incorporated. The egg helps bind the ingredients together, while the vanilla adds that cozy, sweet aroma to your cookies.
5. Gradually Add the Dry Ingredients
Slowly add the flour mixture to the wet ingredients, mixing until just combined. Be careful not to overmix; you want the dough to come together but not become too tough.
6. Fold in the White Chocolate and Crushed Candy Canes
Now comes the fun part! Gently fold in the white chocolate chips and the crushed candy cane pieces. I love the sound of candy canes crunching as they break into little pieces—it’s like the sound of the holidays! The white chocolate chips will melt slightly into the dough, creating creamy pockets of chocolate in every bite.
7. Scoop the Dough
Using a cookie scoop or tablespoon, scoop out portions of dough and roll them into balls. Place them on your prepared baking sheets, spacing them about 2 inches apart. These cookies don’t spread too much, but giving them space ensures they bake evenly.
8. Bake the Cookies
Bake the cookies in your preheated oven for 10-12 minutes or until the edges are golden brown. The centers will still be soft, and that’s okay—these cookies will firm up as they cool. Don’t overbake them; the chewy texture is key!
9. Cool and Add Extra Candy Cane Topping
Once your cookies are out of the oven, let them cool on the baking sheets for 5 minutes. Then, transfer them to a wire rack to cool completely. If you’d like to add an extra holiday touch, you can sprinkle a little more crushed candy cane on top while they’re still warm.
- Prep Time: 15 minutes
- Cook Time: 10 minutes
Nutrition
- Serving Size: 24
- Calories: 150
- Sugar: 16g
- Fat: 8g
- Carbohydrates: 21g
- Protein: 1g
Conclusion: A Sweet Holiday Tradition
Baking White Chocolate Candy Cane Cookies is a wonderful way to bring holiday cheer into your home. Whether you’re making them for a party, giving them as gifts, or simply indulging in a little holiday treat, these cookies are sure to delight. They combine the sweetness of white chocolate with the refreshing crunch of candy canes, creating a flavor that’s both festive and irresistible.
What’s even better is that these cookies are easy to make, adaptable to different tastes, and perfect for creating lasting memories with loved ones. So, the next time you’re planning your holiday baking, make sure to add this recipe to your list. It’s a guaranteed crowd-pleaser that will fill your kitchen with warmth and the sweet scent of the season.
Final Thoughts
There’s nothing quite like a homemade cookie to bring everyone together during the holidays, and these White Chocolate Candy Cane Cookies are sure to be a hit with friends and family. Whether you’re baking for a holiday gathering, giving them as a gift, or just enjoying them on a cozy evening at home, these cookies are sure to spread some cheer.
The combination of smooth white chocolate, refreshing candy canes, and a chewy cookie base is truly a match made in holiday heaven. And best of all, they’re easy to make and oh-so-delicious! So grab your ingredients, turn on your favorite holiday playlist, and get ready to bake up a batch of these festive treats. Happy baking!

