Introduction
S’mores have always been one of those nostalgic treats that bring back memories of summer campfires, toasted marshmallows, and sticky fingers. And let me tell you, this S’mores Cake is the perfect way to take that classic campfire treat and turn it into a decadent, moist dessert you can enjoy year-round—no fire required! Picture layers of rich, chocolate cake, gooey marshmallow frosting, and a sprinkle of graham cracker crumbs for that satisfying crunch. It’s a slice of comfort wrapped in sweet, gooey goodness.
I first stumbled upon the idea of making a s’mores cake when I was craving the flavors of s’mores but wanted something that would feel a little fancier for a family gathering. Honestly, I didn’t expect it to become one of my favorite go-to desserts, but it has. It’s perfect for birthdays, casual get-togethers, or just when you need something indulgent to satisfy your sweet tooth. Every bite takes me back to those carefree summer days when all I had to worry about was whether I could get my marshmallow toasted just right.
Now, I’m excited to share this recipe with you because I’m sure it will become a favorite in your house too. It’s incredibly easy to make, full of rich flavors, and it’s sure to impress anyone you serve it to. You can even customize it with your favorite marshmallow topping or throw in a little extra chocolate for an extra decadent twist. Ready to dive in?
Why You’ll Love This S’mores Cake
Let me tell you why this cake is an absolute must-try:
- Easy to Make: Even if you’ve never baked a cake from scratch before, this recipe is super simple. With just a few ingredients, you’ll have a gorgeous cake that looks like it came from a bakery.
- Full of Flavor: The layers of moist chocolate cake, creamy marshmallow frosting, and crunchy graham cracker crumbs create the perfect balance of flavors and textures. It’s a dessert that will make your taste buds do a little happy dance.
- Customizable: You can switch up the chocolate cake with a spiced cake or even a gluten-free version, and you can add extra layers of marshmallow for a truly gooey experience.
- Perfect for All Ages: Whether you’re baking for kids or adults, this cake will be a hit. It’s a treat everyone will love, and it’s the kind of cake you’ll crave for any occasion, whether it’s a family dinner or just a cozy afternoon with a cup of coffee.
If you’re a fan of s’mores, or even just chocolate cake with a fun twist, this recipe is calling your name. Let’s get started!
Preparation Time and Servings
- Total Time: 1 hour 15 minutes
- Prep Time: 20 minutes
- Cook Time: 30 minutes (for the cake layers)
- Chill Time: 25 minutes (for the frosting)
- Servings: 12-16 slices, depending on how generous you are with the portions
Nutrition Facts (approximate per slice):
- Calories: 350
- Fat: 15g
- Carbs: 50g
- Protein: 4g
(Note: Nutritional information may vary based on ingredient substitutions.)
Ingredients
Cake:
- 2 cups all-purpose flour
- 1 ½ cups granulated sugar
- ¾ cup cocoa powder
- 1 ½ teaspoons baking powder
- 1 teaspoon baking soda
- 1 teaspoon salt
- 2 large eggs, at room temperature
- 1 cup whole milk
- ½ cup vegetable oil
- 2 teaspoons vanilla extract
- 1 cup boiling water (yes, this helps make the cake super moist!)
Marshmallow Frosting:
- 2 cups powdered sugar
- 1 cup unsalted butter, softened
- 1 ½ cups marshmallow fluff
- 1 teaspoon vanilla extract
- Pinch of salt
- 1-2 tablespoons heavy cream (if needed for consistency)
Graham Cracker Crust (for topping):
- 1 ½ cups graham cracker crumbs
- 3 tablespoons unsalted butter, melted
- 2 tablespoons brown sugar
Decoration:
- 1 cup mini chocolate chips (optional for extra richness)
- 1 cup mini marshmallows (for topping the cake)
- ½ cup more graham cracker crumbs for sprinkling
Step-by-Step Instructions
1. Preheat Your Oven and Prepare Your Pans
Preheat your oven to 350°F (175°C) and grease and flour two 9-inch round cake pans. This helps ensure the cake comes out nice and easily. You can also line the bottom with parchment paper for extra insurance.
2. Mix the Dry Ingredients for the Cake
In a large mixing bowl, whisk together the flour, granulated sugar, cocoa powder, baking powder, baking soda, and salt. Make sure everything is well combined. The cocoa powder gives the cake its rich chocolate flavor, and the baking soda and powder will help the cake rise beautifully.
3. Add the Wet Ingredients
In a separate bowl, whisk together the eggs, milk, vegetable oil, and vanilla extract. Add these wet ingredients to the dry mixture and stir until fully combined. The batter will be quite thick at this point, but don’t worry—that’s normal!
4. Incorporate the Boiling Water
Carefully pour in the boiling water. This step is key to making the cake moist and tender. The batter will be thin now, but it will bake into the most delicious, soft, chocolatey cake you’ve ever tasted. Stir everything together.
5. Bake the Cake Layers
Divide the batter evenly between the prepared cake pans and smooth the tops. Bake for 30-35 minutes, or until a toothpick inserted into the center comes out clean. Don’t forget to rotate the pans halfway through baking for even cooking.
6. Cool the Cake Layers
Allow the cakes to cool in the pans for 10 minutes before transferring them to a wire rack to cool completely. You want them to be completely cool before frosting—this ensures the frosting won’t melt!
7. Make the Marshmallow Frosting
While the cakes are cooling, it’s time to make the marshmallow frosting. In a large bowl, beat together the softened butter and powdered sugar until light and fluffy. Add the marshmallow fluff, vanilla extract, and a pinch of salt. If the frosting feels too thick, add a tablespoon or two of heavy cream until you get the perfect spreadable consistency.
8. Prepare the Graham Cracker Crust
To make the graham cracker topping, mix together the graham cracker crumbs, melted butter, and brown sugar. Stir until the crumbs are evenly coated. This will give the cake a crunchy, crumbly topping that’s so reminiscent of traditional s’mores.
9. Assemble the Cake
Once the cake layers have cooled completely, place one layer of cake on a cake plate or serving platter. Spread a generous layer of marshmallow frosting on top, followed by a sprinkle of graham cracker crumbs. Place the second cake layer on top and spread the rest of the frosting over the top and sides of the cake.
10. Decorate the Cake
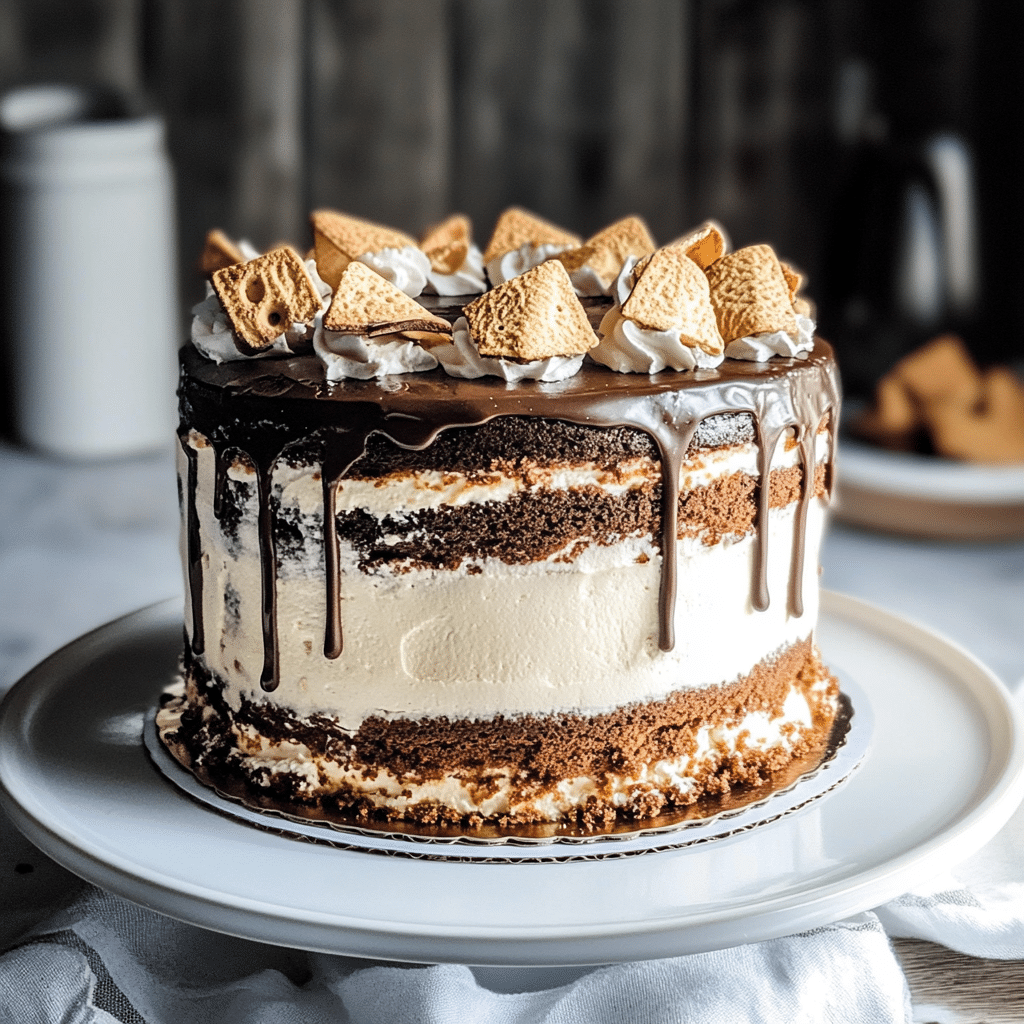
Sprinkle the remaining graham cracker crumbs over the top and sides of the cake. Then, add mini marshmallows and chocolate chips on top for that signature s’mores look. If you’re feeling extra indulgent, you can even lightly toast the marshmallows using a kitchen torch for that authentic s’mores experience.
How to Serve
- Serve as a Layered Cake: Slice into generous pieces, and serve each slice with a glass of milk for the ultimate indulgence. The gooey marshmallow frosting and chocolate cake will melt in your mouth.
- S’mores Cake Sundae: For a fun twist, serve the cake with a scoop of vanilla ice cream on top and drizzle with chocolate sauce. You’ll get all the s’mores flavors in one bite!
- Kids’ Party: This cake is perfect for kids’ parties—everyone will be wowed by the playful layers and delicious flavors.
Additional Tips
- Don’t Overmix the Batter: Be sure not to overmix when combining the wet and dry ingredients. This will keep the cake tender and light.
- Let the Cake Cool Completely: If the cake is still warm, the frosting will melt right off. Let the cakes cool completely before frosting.
- Toast the Marshmallows: For a fun and authentic touch, use a kitchen torch to lightly toast the mini marshmallows before decorating your cake.
- Storage: Store leftover cake in an airtight container at room temperature for up to 3 days.
Recipe Variations
- Gluten-Free S’mores Cake: Use a gluten-free flour blend in place of all-purpose flour.
- Vegan S’mores Cake: Substitute non-dairy milk (like almond or oat milk) and use vegan butter and marshmallow fluff to make this cake vegan-friendly.
- Add a Layer of Chocolate Ganache: For extra chocolate goodness, drizzle ganache over the cake before adding the marshmallow frosting.
Freezing and Make-Ahead Tips
You can freeze the cake layers for up to 3 months. Simply wrap them tightly in plastic wrap and foil, then place them in a freezer-safe bag. When you’re ready to serve, thaw them at room temperature, then proceed with frosting and decorating.
Frequently Asked Questions (FAQ)
1. Can I make this cake ahead of time?
Yes! This cake can be made in advance. You can bake the cake layers and store them in an airtight container at room temperature for up to 2 days. The marshmallow frosting can also be made a day ahead and stored in the fridge. Just let it come to room temperature before frosting the cake. You can assemble the entire cake a day before your event—just keep it stored in the fridge or at room temperature, depending on how quickly you plan to serve it.
2. Can I use store-bought marshmallow fluff?
Yes, you can absolutely use store-bought marshmallow fluff for the frosting! In fact, it’s a great time-saver and still gives you that signature marshmallow flavor. You can also substitute marshmallow creme if that’s what you have on hand.
3. How can I make the frosting extra fluffy?
To make the frosting even fluffier, try whipping the butter and powdered sugar for a little longer (about 5 minutes) until it becomes light and airy. You can also add an extra tablespoon of heavy cream to achieve a lighter consistency, making it even easier to spread.
4. Can I substitute the graham cracker crumbs for something else?
If you don’t have graham crackers, you can substitute with crushed digestive biscuits or even vanilla wafer cookies. The graham cracker flavor adds a nostalgic element to the cake, but feel free to experiment with different crunch options to find what works best for you.
5. How do I toast the marshmallows for decoration?
You can toast the mini marshmallows using a kitchen torch or under the broiler in your oven. If using a kitchen torch, carefully toast the marshmallows until they’re golden and slightly charred. If using the oven, place the marshmallows on top of the cake and broil for 1-2 minutes, keeping a close eye on them to avoid burning.
6. How do I store leftover S’mores Cake?
Store leftover cake in an airtight container at room temperature for up to 3 days. If you need to store it longer, you can freeze individual slices wrapped in plastic wrap and foil for up to 3 months. Just thaw them at room temperature before serving.
7. Can I make this cake gluten-free or vegan?
Yes, absolutely! To make the cake gluten-free, swap out the all-purpose flour for a gluten-free flour blend. For a vegan version, substitute dairy-free milk (like almond or oat milk), vegan butter, and a vegan marshmallow fluff. There are plenty of great alternatives out there that still give you that delicious s’mores flavor.
8. How can I make the cake more chocolatey?
If you love extra chocolate, try adding chocolate chips into the cake batter or drizzle some chocolate ganache over the cake before decorating it with marshmallows. It’s a great way to up the chocolate factor and add another layer of flavor.
Print
S’mores Cake
- Total Time: 1 hour
Ingredients
For the Cake:
- 2 cups all-purpose flour
- 1 ½ cups granulated sugar
- ¾ cup cocoa powder
- 1 ½ teaspoons baking powder
- 1 teaspoon baking soda
- 1 teaspoon salt
- 2 large eggs, at room temperature
- 1 cup whole milk
- ½ cup vegetable oil
- 2 teaspoons vanilla extract
- 1 cup boiling water (yes, this helps make the cake super moist!)
For the Marshmallow Frosting:
- 2 cups powdered sugar
- 1 cup unsalted butter, softened
- 1 ½ cups marshmallow fluff
- 1 teaspoon vanilla extract
- Pinch of salt
- 1–2 tablespoons heavy cream (if needed for consistency)
For the Graham Cracker Crust (for topping):
- 1 ½ cups graham cracker crumbs
- 3 tablespoons unsalted butter, melted
- 2 tablespoons brown sugar
For the Decoration:
- 1 cup mini chocolate chips (optional for extra richness)
- 1 cup mini marshmallows (for topping the cake)
- ½ cup more graham cracker crumbs for sprinkling
Instructions
1. Preheat Your Oven and Prepare Your Pans
Preheat your oven to 350°F (175°C) and grease and flour two 9-inch round cake pans. This helps ensure the cake comes out nice and easily. You can also line the bottom with parchment paper for extra insurance.
2. Mix the Dry Ingredients for the Cake
In a large mixing bowl, whisk together the flour, granulated sugar, cocoa powder, baking powder, baking soda, and salt. Make sure everything is well combined. The cocoa powder gives the cake its rich chocolate flavor, and the baking soda and powder will help the cake rise beautifully.
3. Add the Wet Ingredients
In a separate bowl, whisk together the eggs, milk, vegetable oil, and vanilla extract. Add these wet ingredients to the dry mixture and stir until fully combined. The batter will be quite thick at this point, but don’t worry—that’s normal!
4. Incorporate the Boiling Water
Carefully pour in the boiling water. This step is key to making the cake moist and tender. The batter will be thin now, but it will bake into the most delicious, soft, chocolatey cake you’ve ever tasted. Stir everything together.
5. Bake the Cake Layers
Divide the batter evenly between the prepared cake pans and smooth the tops. Bake for 30-35 minutes, or until a toothpick inserted into the center comes out clean. Don’t forget to rotate the pans halfway through baking for even cooking.
6. Cool the Cake Layers
Allow the cakes to cool in the pans for 10 minutes before transferring them to a wire rack to cool completely. You want them to be completely cool before frosting—this ensures the frosting won’t melt!
7. Make the Marshmallow Frosting
While the cakes are cooling, it’s time to make the marshmallow frosting. In a large bowl, beat together the softened butter and powdered sugar until light and fluffy. Add the marshmallow fluff, vanilla extract, and a pinch of salt. If the frosting feels too thick, add a tablespoon or two of heavy cream until you get the perfect spreadable consistency.
8. Prepare the Graham Cracker Crust
To make the graham cracker topping, mix together the graham cracker crumbs, melted butter, and brown sugar. Stir until the crumbs are evenly coated. This will give the cake a crunchy, crumbly topping that’s so reminiscent of traditional s’mores.
9. Assemble the Cake
Once the cake layers have cooled completely, place one layer of cake on a cake plate or serving platter. Spread a generous layer of marshmallow frosting on top, followed by a sprinkle of graham cracker crumbs. Place the second cake layer on top and spread the rest of the frosting over the top and sides of the cake.
10. Decorate the Cake
Sprinkle the remaining graham cracker crumbs over the top and sides of the cake. Then, add mini marshmallows and chocolate chips on top for that signature s’mores look. If you’re feeling extra indulgent, you can even lightly toast the marshmallows using a kitchen torch for that authentic s’mores experience.
- Prep Time: 20 minutes
- Cook Time: 30 minutes
Nutrition
- Serving Size: 16
- Calories: 350
- Fat: 15g
- Carbohydrates: 50g
- Protein: 4g
Conclusion
There’s no denying that a good cake can brighten anyone’s day, and this S’mores Cake is one that will bring a smile to your face with every bite. It’s the perfect balance of chocolatey richness, gooey marshmallow frosting, and crunchy graham cracker topping, all while capturing that nostalgic s’mores experience we know and love.
Whether you’re baking for a special occasion or just because you’re craving a slice of something sweet, this cake will not disappoint. It’s so versatile—you can make it ahead, tweak it to suit your dietary preferences, and even get creative with your toppings. And the best part? It’s incredibly easy to make, which means you can focus on enjoying the dessert and making memories with the people you love.
So, grab your apron, preheat that oven, and get ready to indulge in this perfect slice of comfort. You deserve it!
Happy baking, and I hope this S’mores Cake becomes a new favorite in your recipe collection. Enjoy!


