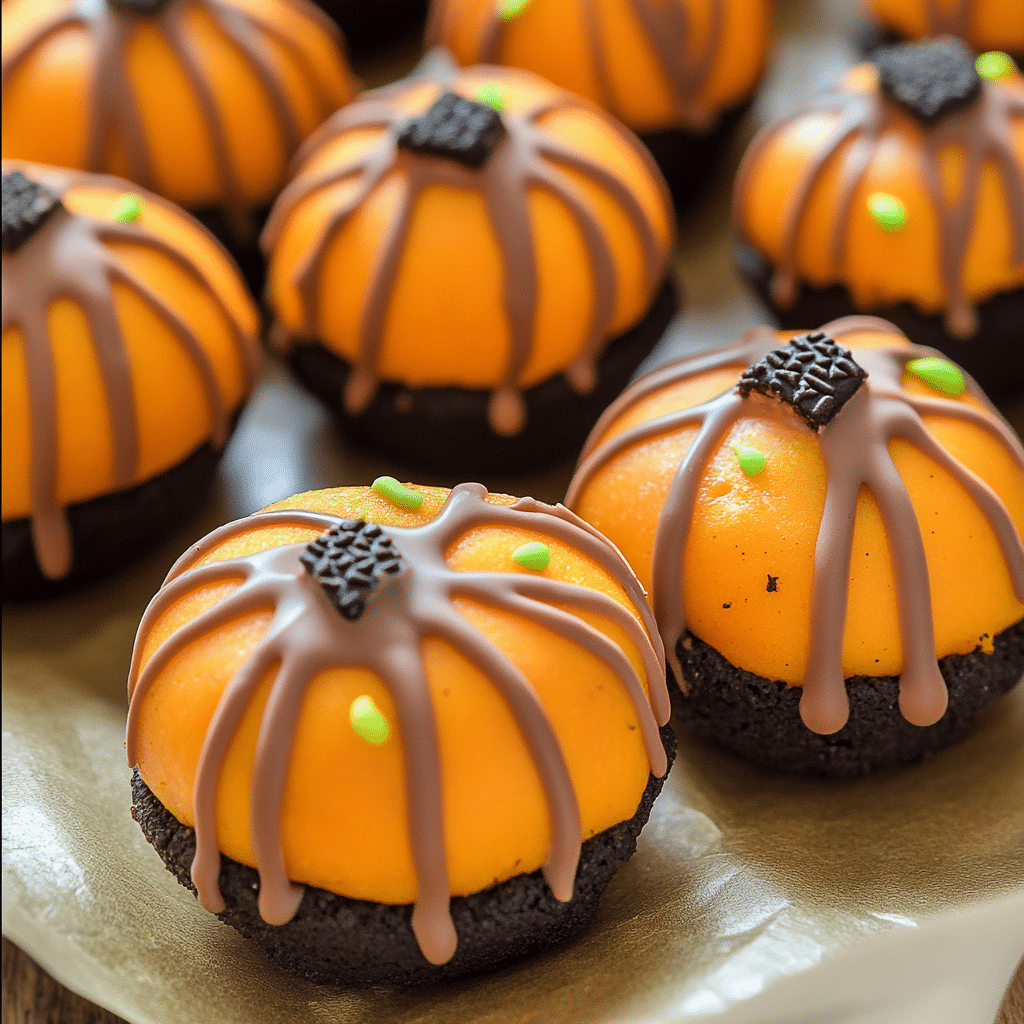
Pumpkin Oreo Balls are the ultimate no-bake Halloween treat that everyone will love! These delightful little bites combine the rich flavors of chocolate Oreos, tangy cream cheese, and a hint of pumpkin spice, all dipped in creamy candy coating to look like adorable mini pumpkins. They’re perfect for Halloween parties, fall gatherings, or just a fun weekend baking project with the family. Not only are they cute and festive, but they’re also incredibly easy to make, requiring just a handful of ingredients and no baking at all!
The first time I made Pumpkin Oreo Balls, I was blown away by how simple they were to put together. I had always thought that truffle-style desserts like these would be complicated, but they couldn’t have been easier. Plus, the flavor was amazing—rich, chocolaty, and just a little spicy from the pumpkin pie spice. After dipping them in orange candy melts and adding little green stems, I couldn’t stop smiling at how cute they turned out! Now, these Pumpkin Oreo Balls are a must-make for Halloween and any fall-themed get-togethers.
Why You’ll Love This Recipe:
- No-bake: There’s no need to turn on the oven for this recipe, which makes it quick and convenient.
- Festive and fun: These Oreo balls are shaped like little pumpkins, making them a perfect treat for Halloween or any fall event.
- Simple ingredients: With only a few ingredients, you can whip up these Oreo balls in no time.
- Customizable: You can get creative with the decorations or switch up the flavors to suit your tastes.
- Make ahead: These Oreo balls store well, so you can make them in advance for parties or events.
Preparation Time and Servings:
Total Time: 2 hours (includes chilling time)
Servings: 24 Pumpkin Oreo Balls
Calories per serving: 140
Protein: 1g
Carbs: 15g
Ingredients:
For the Oreo balls:
- 1 package (14.3 oz) Oreo cookies
- 8 oz cream cheese, softened
- 1 teaspoon pumpkin pie spice (optional, for extra fall flavor)
- 12 oz orange candy melts (or white chocolate with orange food coloring)
- 1/4 cup green candy melts (for the pumpkin stems)
For decoration (optional):
- Pretzel sticks or green candy melts (for pumpkin stems)
- Black edible marker or melted chocolate (for drawing faces, if you want to make jack-o’-lanterns)
Oreo Cookies: Regular Oreos work great for this recipe, but feel free to use Golden Oreos or any seasonal Oreo flavor to change things up.
Cream Cheese: This adds richness and creaminess to the Oreo mixture, helping everything come together into a smooth, truffle-like filling. Make sure your cream cheese is softened so it mixes easily with the crushed Oreos.
Pumpkin Pie Spice: This is optional but highly recommended if you want to add a fall flavor twist to your Oreo balls. It gives them a hint of warm spices like cinnamon, nutmeg, and cloves, making them perfect for autumn.
Candy Melts: Orange candy melts are used to give the Oreo balls their pumpkin appearance. You can also use white chocolate and add orange food coloring if you prefer. Green candy melts or pretzel sticks make for easy, edible pumpkin stems.
Decoration Options: If you want to go all out, you can decorate your Pumpkin Oreo Balls as jack-o’-lanterns using melted chocolate or an edible marker to draw spooky or cute faces.
Step-by-Step Instructions:
1. Crush the Oreo cookies:
- Place the Oreo cookies (including the filling) in a food processor and pulse until they become fine crumbs. If you don’t have a food processor, you can place the Oreos in a zip-top bag and crush them using a rolling pin until they’re finely ground.
- Transfer the crushed Oreos to a large mixing bowl.
2. Make the Oreo mixture:
- Add the softened cream cheese and pumpkin pie spice (if using) to the bowl with the crushed Oreos. Use a hand mixer or a wooden spoon to mix everything together until fully combined and smooth. The mixture should resemble a thick dough.
- Once combined, cover the bowl and refrigerate the mixture for 30 minutes to 1 hour. This will help the mixture firm up, making it easier to roll into balls.
3. Form the Oreo balls:
- Line a baking sheet with parchment paper or wax paper. Remove the Oreo mixture from the refrigerator and, using a small cookie scoop or spoon, scoop out about 1 tablespoon of the mixture. Roll it between your hands to form a smooth ball.
- Place each ball on the prepared baking sheet. Repeat this process until all the Oreo mixture is used. You should have about 24 Oreo balls.
- Once all the balls are formed, place the baking sheet in the freezer for 15-20 minutes to firm up the Oreo balls. This step is crucial for keeping the balls intact during the dipping process.
4. Melt the candy coating:
- While the Oreo balls are chilling, melt the orange candy melts according to the package instructions. Typically, this involves microwaving them in a microwave-safe bowl in 30-second increments, stirring in between, until fully melted and smooth.
- If the candy melts seem too thick for dipping, you can add 1 teaspoon of vegetable oil or coconut oil to thin it out. Stir until smooth.
- Melt the green candy melts in a separate bowl using the same method, or prepare your pretzel sticks for the pumpkin stems.
5. Dip the Oreo balls:
- Remove the Oreo balls from the freezer. Using a fork or dipping tool, dip each Oreo ball into the melted orange candy coating, making sure it’s fully coated. Let any excess coating drip off before placing the Oreo ball back onto the parchment-lined baking sheet.
- Immediately place a small piece of pretzel stick into the top of each Oreo ball to create the pumpkin stem. If using green candy melts, wait for the orange coating to set before piping a small green stem on top with a piping bag or zip-top bag with the corner snipped off.
- Repeat the process until all the Oreo balls are dipped and decorated. Allow them to set at room temperature until the candy coating hardens completely.
6. Optional: Add jack-o’-lantern faces:
- If you want to turn your Pumpkin Oreo Balls into jack-o’-lanterns, you can use a black edible marker or melted chocolate to draw faces on each pumpkin. You can make them cute or spooky, depending on your Halloween vibe!
- To use melted chocolate, place some melted dark chocolate or black candy melts in a piping bag or a small zip-top bag with a tiny hole cut in the corner. Gently pipe eyes, noses, and mouths onto each Oreo ball.
How to Serve:
- Serve these Pumpkin Oreo Balls on a Halloween-themed platter as part of your dessert spread.
- They make great bite-sized treats for Halloween parties, kids’ events, or even as a sweet snack to enjoy with your family.
- Add them to your Halloween dessert table alongside other festive treats like ghost cupcakes, witch hat cookies, or spiderweb brownies.
Additional Tips:
- Chill before rolling: Chilling the Oreo mixture before rolling it into balls makes the process much easier and less sticky. If you find the mixture too soft to handle, pop it in the freezer for a few minutes.
- Work quickly when dipping: The Oreo balls should be very cold when you dip them into the candy melts. This helps the coating set quickly and prevents the balls from falling apart.
- Use toothpicks for easier dipping: If you’re struggling to dip the Oreo balls evenly, insert a toothpick into each ball before dipping it into the candy coating. Once dipped, carefully remove the toothpick and use a small dab of candy melt to cover the hole.
Recipe Variations:
- Golden Oreo Balls: Swap the classic Oreos for Golden Oreos to create a vanilla-flavored version of these pumpkin balls. You can still use the same orange candy melts for the pumpkin look, or go with white chocolate for a simpler design.
- Pumpkin Spice Oreo Balls: If you can find Pumpkin Spice Oreos, they make a fantastic seasonal variation on this recipe! Pair them with a little extra pumpkin pie spice for an even more intense fall flavor.
- Nutella-filled Oreo Balls: For an extra indulgent twist, try stuffing the Oreo balls with a small dollop of Nutella or peanut butter before rolling them into balls.
- Halloween Oreo Balls: Use Halloween-themed Oreos, which often come with orange-colored filling, to enhance the festive look of your Oreo balls. You can also use black candy melts or purple candy melts for a spooky Halloween twist.
Serving Suggestions:
- Party platter: Arrange these Pumpkin Oreo Balls on a Halloween-themed platter, surrounded by mini pumpkins, candy corn, or plastic spiders for a festive display.
- Gift boxes: These Pumpkin Oreo Balls also make a great edible gift! Pack them in small treat boxes or Halloween-themed bags to give to friends, family, or party guests.
- With other Halloween treats: Serve the Oreo balls alongside other spooky desserts like witch finger cookies, mummy rice krispie treats, or spider cupcakes for a full Halloween spread.
Freezing and Storage:
- Storage: Store the Oreo balls in an airtight container in the refrigerator for up to 5 days. The cold will help the candy coating stay firm and keep the cream cheese filling fresh.
- Freezing: These Pumpkin Oreo Balls freeze beautifully! Once the candy coating has fully set, place the Oreo balls in an airtight container or freezer-safe bag and freeze for up to 2 months. Thaw them in the refrigerator overnight before serving.
Special Equipment:
- Food processor: A food processor is the easiest way to crush the Oreos into fine crumbs, but if you don’t have one, you can use a rolling pin and zip-top bag.
- Microwave-safe bowls: You’ll need these to melt the candy melts for dipping the Oreo balls.
- Piping bags or zip-top bags: These are handy if you’re using melted chocolate or green candy melts to decorate your Oreo balls.
FAQ:
- Can I use different types of Oreos? Absolutely! Feel free to use any flavor of Oreo you like—Golden Oreos, Pumpkin Spice Oreos, or even the Halloween Oreos with orange filling are all great choices.
- Can I make these ahead of time? Yes! You can make these Pumpkin Oreo Balls up to 3 days in advance and store them in the fridge until you’re ready to serve them. They also freeze well for longer storage.
- What if I don’t have candy melts? You can use white chocolate or even regular chocolate chips instead of candy melts. If using white chocolate, add a few drops of orange food coloring to achieve the pumpkin look.
- Can I skip the pumpkin pie spice? Yes! The pumpkin pie spice is optional, so if you prefer a classic Oreo flavor, you can leave it out.
- What if I don’t have a food processor? You can crush the Oreos by placing them in a zip-top bag and using a rolling pin to crush them into fine crumbs.
Conclusion:
Pumpkin Oreo Balls are a simple, no-bake Halloween treat that brings together rich chocolate, creamy filling, and a touch of pumpkin spice for the perfect fall flavor. They’re incredibly easy to make and fun to decorate, making them ideal for Halloween parties, family gatherings, or even as a festive homemade gift. Whether you keep them simple with just a pumpkin shape or turn them into spooky jack-o’-lanterns, these little Oreo balls are sure to be a hit with everyone who tries them. I can’t wait for you to make them and share your creative decorations! Be sure to snap a picture and tag me on social media—I’d love to see how your Pumpkin Oreo Balls turn out! Happy Halloween! 🎃
Print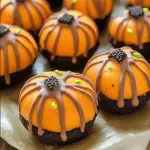
Pumpkin Oreo Balls
- Total Time: 50 minutes
Description
Pumpkin Oreo Balls have become a delightful fall favorite in my house, and let me tell you, they’re a hit every time I make them. Imagine this: rich Oreo goodness wrapped in a spiced pumpkin blanket, dipped in creamy white chocolate—absolute perfection in every bite. My family couldn’t stop grabbing them from the fridge! They’re easy to make, and even easier to devour. The best part? These little treats are no-bake, which means less time in the kitchen and more time enjoying that delicious pumpkin flavor. Trust me, once you try these, they’ll become a staple in your fall dessert lineup.
Ingredients
Here’s what you need to make these indulgent Pumpkin Oreo Balls:
- 1 package of Oreo cookies (regular or golden Oreos work well)
- 1/2 cup pumpkin puree (canned or homemade)
- 1 teaspoon pumpkin pie spice
- 1 (8 oz) package of cream cheese, softened
- 2 cups white chocolate chips (or white candy melts)
- Optional: orange food coloring for festive fall vibes
- Sprinkles, crushed Oreos, or chopped nuts for decorating (optional)
Instructions
- Crush the Oreos: Start by placing the Oreo cookies in a food processor and pulsing until they turn into fine crumbs. No big chunks should remain. If you don’t have a food processor, you can place the Oreos in a resealable plastic bag and crush them with a rolling pin.
- Mix with pumpkin and cream cheese: In a large mixing bowl, combine the crushed Oreos, pumpkin puree, pumpkin pie spice, and softened cream cheese. Use a hand mixer or a sturdy spoon to mix everything together until it forms a sticky dough.
- Shape the balls: Scoop out the dough using a small cookie scoop or spoon (about 1-2 tablespoons per ball). Roll each portion between your hands to form smooth balls. Place the balls onto a baking sheet lined with parchment paper. Freeze the balls for about 20-30 minutes to firm up.
- Melt the chocolate: In a microwave-safe bowl, melt the white chocolate chips in 20-second increments, stirring in between until smooth. If desired, you can add a few drops of orange food coloring to make the coating more festive.
- Coat the Oreo balls: Once the Oreo balls are firm, dip each one into the melted white chocolate using a fork or toothpick. Tap off any excess chocolate, and then place the dipped balls back on the parchment-lined tray.
- Decorate: While the coating is still wet, sprinkle the balls with your favorite toppings—crushed Oreos, fall-colored sprinkles, or chopped nuts work great. Let them set in the fridge until the chocolate hardens, about 10-15 minutes.
- Enjoy: Once set, your Pumpkin Oreo Balls are ready to serve!
- Prep Time: 20 minutes
- Cook Time: 30 minutes
Nutrition
- Serving Size: 24
- Calories: 120

