introduction
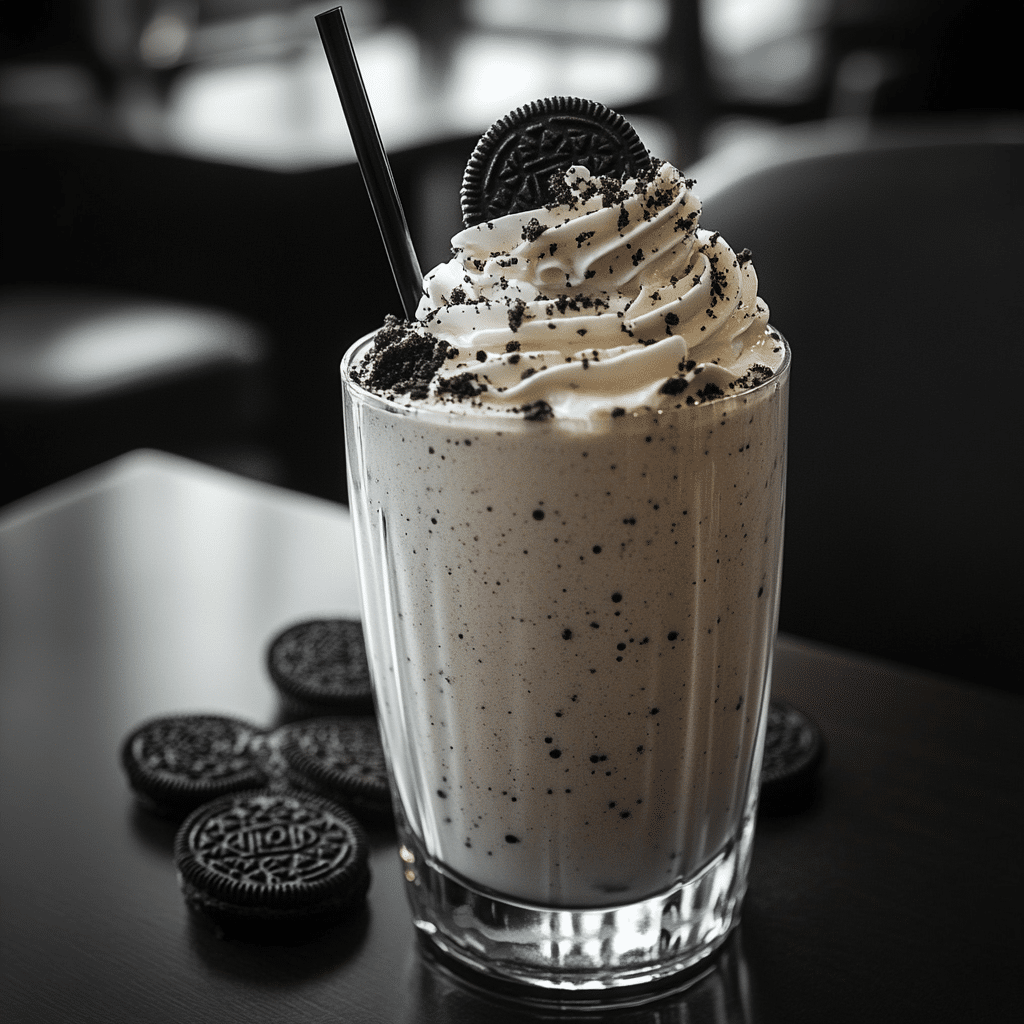
There’s something magical about an Oreo milkshake that just makes you feel all warm and fuzzy inside. Maybe it’s the thick, creamy texture. Or maybe it’s the delicious crunch of those beloved chocolate cookies blending perfectly into the smooth vanilla ice cream. Either way, this milkshake is the definition of indulgence. Every sip is like a treat you can’t resist, and the best part? It’s ridiculously easy to make. So grab your blender, pull out some Oreos, and let’s get to work on creating the ultimate Oreo milkshake that will have you hooked after just one sip.
I remember the first time I tried making an Oreo milkshake at home—it felt like one of those classic “why didn’t I think of this sooner?” moments. I was craving something sweet, and I had all the ingredients sitting in my kitchen. I threw everything into my blender and waited, a bit skeptically at first. But when I tasted it? Pure bliss. It’s been a go-to recipe ever since for movie nights, dessert cravings, and just about every special occasion in between. If you love Oreos and milkshakes, you are in for a treat.
Why You’ll Love This Oreo Milkshake Recipe
There are a million reasons to love this Oreo milkshake, and here are just a few:
- Super Simple: With just a few ingredients, you can whip up a decadent milkshake in no time. It’s a perfect option for a last-minute dessert or a treat when you just need something sweet.
- Customizable: Whether you like your milkshake extra thick or with a little extra Oreo crunch, you can easily adjust the ingredients to match your preference.
- Perfectly Creamy: The combination of rich vanilla ice cream, milk, and crushed Oreos creates a smooth and creamy texture that’s completely irresistible.
- Family-Favorite: Kids, adults, and everyone in between will love this milkshake. It’s the kind of treat that brings everyone together and makes moments feel a little sweeter.
Honestly, when you have an Oreo milkshake in hand, the world just feels like a better place. It’s one of those recipes that makes people smile, and let’s be honest, we could all use a little more joy, right?
Preparation Time and Servings
Total Time: 10 minutes
Servings: 2-3
Whether you’re serving this up for a couple of friends or treating yourself, this recipe makes the perfect amount for 2-3 servings. Plus, it’s easy to double or even triple the ingredients if you want to make a whole batch for a party or gathering.
Nutrition Facts (per serving, makes 3 servings):
Calories: 500
Protein: 6g
Carbs: 70g
Fat: 25g
These numbers are just an estimate, and honestly, if you’re here for an indulgent treat, I say go for it. After all, balance is key, and this milkshake is all about enjoying life’s little pleasures!
Ingredients
This recipe uses simple, everyday ingredients that you probably already have in your pantry and fridge. Here’s what you’ll need:
- 4 large scoops vanilla ice cream: The base of any great milkshake. I recommend using a rich, creamy vanilla ice cream for the best flavor.
- 1 ½ cups whole milk: Whole milk gives the milkshake its smooth, creamy texture. You can swap this out for almond milk or any dairy-free option if needed.
- 10-12 Oreo cookies: The star of the show! You’ll want to use classic Oreos for the authentic flavor, but feel free to get creative with variations like double stuff or mint Oreos if that’s more your style.
- 1 tsp vanilla extract: A touch of vanilla helps to bring out the sweetness and richness of the ice cream and Oreos.
- Whipped cream (optional, for topping): Because who doesn’t love a big swirl of whipped cream on top of a milkshake? This is completely optional, but I highly recommend it for extra decadence.
Optional add-ins:
- Chocolate syrup: Drizzle some chocolate syrup around the inside of the glass for a fun and extra-chocolaty touch.
- Extra crushed Oreos: For a little added crunch, sprinkle some crushed Oreos on top before serving.
- Milkshake straws: I personally love the big, wide straws that are perfect for milkshakes. They make sipping so much more fun!
Step-by-Step Instructions
Now that you have all your ingredients ready, let’s walk through the steps for making this Oreo milkshake. Don’t worry if it feels like a lot of ingredients—this milkshake is super easy to put together, and you’ll be sipping it in no time.
1st sTEP: Add the Ice Cream and Milk to the Blender
Start by scooping the vanilla ice cream into your blender. I like to use about 4 big scoops, but you can adjust depending on how thick or creamy you want your milkshake. Add the whole milk to the blender. The milk is what will help loosen up the ice cream, making it easier to blend.
Tip: If you want a thicker milkshake, reduce the milk a bit, or if you prefer a thinner consistency, add a little more milk. There’s no right or wrong here!
2ND STEP: Add the Oreos
Next, it’s time to add the star ingredient—Oreos! I usually add about 10-12 cookies, but feel free to throw in more if you want an extra-cookie flavor. You can break the Oreos in half or just toss them in whole—the blender will take care of them.
Tip: If you like some larger Oreo chunks in your milkshake, pulse the blender a few times before blending it all the way. If you want a smooth milkshake, blend until everything is completely mixed.
3RD STEP: Blend It All Together
Put the lid on your blender and blend everything until smooth. Start on a lower speed, and gradually increase to high to ensure everything is blended evenly. You should have a creamy, milkshake consistency with small cookie crumbs dispersed throughout.
Tip: Don’t be afraid to stop the blender and scrape down the sides if some of the ice cream gets stuck. A quick pause helps everything blend more smoothly.
4TH STEP: Taste and Adjust
Give your milkshake a quick taste. If you want more vanilla flavor, add a little more vanilla extract. If you want more Oreo crunch, toss in a few extra cookies. Taste-testing is one of the best parts!
5TH STEP: Serve and Garnish
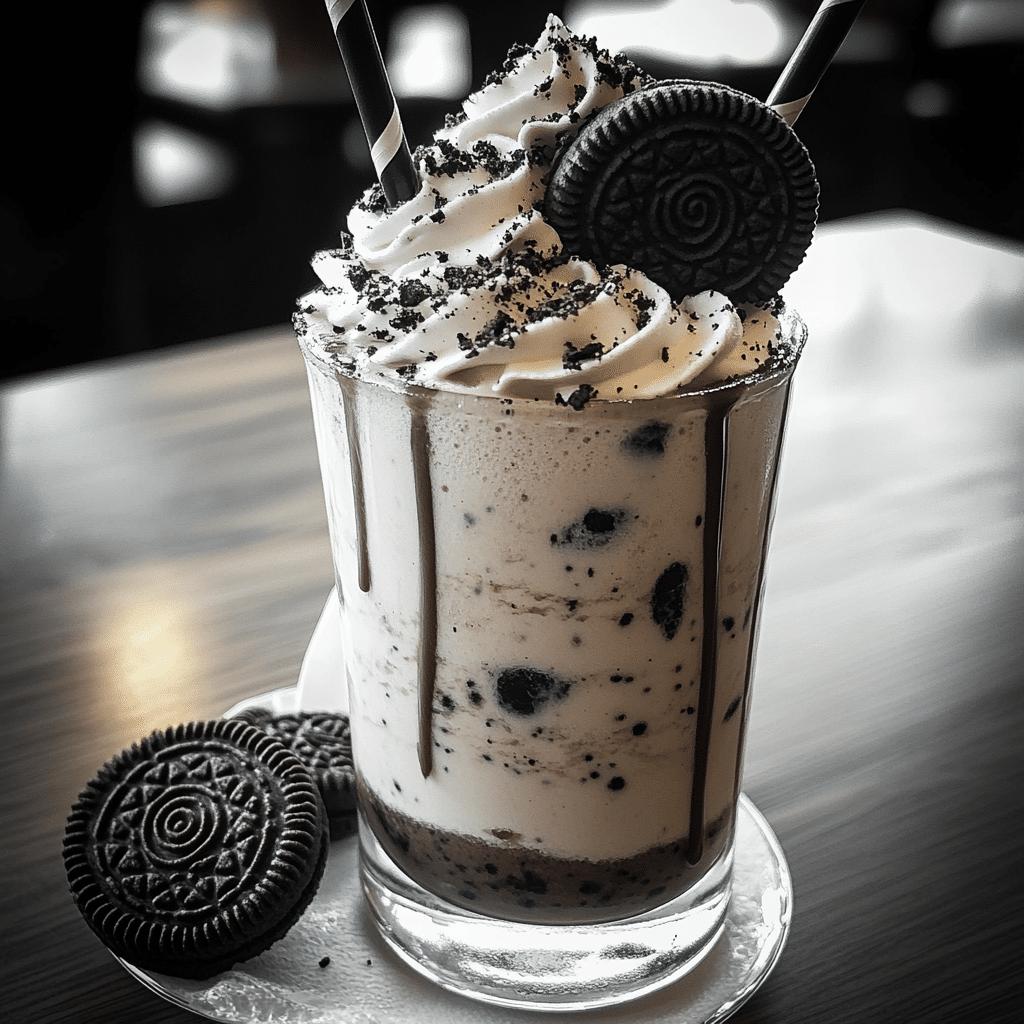
Pour the milkshake into glasses and top with a generous swirl of whipped cream (optional, but oh-so-delicious). If you’re feeling extra fancy, drizzle some chocolate syrup inside the glasses before pouring the milkshake for a fun presentation. You can also sprinkle extra crushed Oreos on top for some added texture.
Tip: Serve immediately with a big straw for that perfect sip!
How to Serve Your Oreo Milkshake
Serving an Oreo milkshake is just as fun as making it! Here are a few ideas to make your treat even more special:
- Serve with extra Oreos on the side: Crumbled up or whole, Oreos are always a perfect pairing with this milkshake.
- Pair with a warm dessert: If you want to take this milkshake to the next level, serve it alongside something warm like a slice of chocolate cake, brownies, or even some freshly baked cookies.
- Top with chocolate syrup: If you didn’t drizzle the syrup inside the glass, now’s your chance! Pour a little on top of the whipped cream for a rich chocolate finish.
Additional Tips for the Perfect Oreo Milkshake
Here are some extra tips to make sure your milkshake turns out perfectly every time:
- Use chilled glasses: For the ultimate experience, chill your milkshake glasses in the freezer before serving. This keeps the milkshake cold longer and gives it that extra touch of indulgence.
- Adjust the sweetness: If you like a sweeter milkshake, add a teaspoon of sugar or a little extra vanilla extract.
- Blend in some chocolate chips: Want more chocolate flavor? Toss in a handful of chocolate chips for a more decadent treat.
- Make it a milkshake float: Top your milkshake with a scoop of vanilla ice cream for an over-the-top float experience.
- Serve with fun straws: It may be a small touch, but those wide, colorful milkshake straws make the experience feel extra special.
Recipe Variations
- Mint Oreo Milkshake: Swap out the regular Oreos for Mint Oreos to give your milkshake a cool, refreshing twist.
- Chocolate Milkshake Base: Use chocolate ice cream instead of vanilla for a double dose of chocolate goodness.
- Vegan Oreo Milkshake: For a vegan version, use dairy-free ice cream and plant-based milk like almond or oat milk.
- Add a Twist: Try adding a handful of peanut butter, caramel sauce, or even marshmallows for an interesting flavor mix.
Freezing and Storage
While this Oreo milkshake is best enjoyed immediately, you can freeze any leftovers if you have them. Store the milkshake in an airtight container and freeze for up to 2 days. When you’re ready to enjoy, let it thaw a bit or blend again for a frosty treat.
Special Equipment
You don’t need any fancy equipment to make this milkshake, but these tools can help:
- Blender: A good-quality blender will help you achieve the smoothest, creamiest milkshake possible.
- Whisk: If you’re adding whipped cream from scratch, a whisk will help you create that airy, fluffy texture.
- Large Straw: A big straw makes it so much easier to sip up all the milkshake goodness!
FAQ
Can I use different flavors of ice cream?
Absolutely! While vanilla ice cream is traditional for an Oreo milkshake, you can experiment with other flavors like chocolate or cookies and cream for a different twist. A chocolate ice cream base will enhance the chocolatey goodness of the Oreos, making for a more indulgent milkshake.
Can I make this milkshake without a blender?
While a blender is the ideal tool for making a milkshake, if you don’t have one, you can use a food processor or even a stand mixer to break up the Oreos and blend the ice cream and milk. It’ll take a bit more time and effort, but you can still make it work!
Can I add other mix-ins to my milkshake?
Yes! Get creative with your Oreo milkshake by adding in other treats like peanut butter, chocolate chips, caramel sauce, or marshmallows. For a crunchy twist, you can even throw in some nuts or pretzels. Just be sure to blend everything well for an even consistency.
How can I make my Oreo milkshake thicker?
If you prefer a thicker milkshake, simply add more ice cream and reduce the amount of milk. You can also freeze the milkshake for 10-15 minutes before serving to help thicken it up further.
Can I make this milkshake vegan?
Yes! To make a vegan Oreo milkshake, just swap the dairy ice cream for a non-dairy variety (such as coconut or almond milk-based ice cream), and use plant-based milk like almond, oat, or soy milk. Be sure to check that your Oreos are vegan, as some brands may contain dairy.
Oreo Milkshake
- Total Time: 10 minutes
Ingredients
- 4 large scoops vanilla ice cream: The base of any great milkshake. I recommend using a rich, creamy vanilla ice cream for the best flavor.
- 1 ½ cups whole milk: Whole milk gives the milkshake its smooth, creamy texture. You can swap this out for almond milk or any dairy-free option if needed.
- 10–12 Oreo cookies: The star of the show! You’ll want to use classic Oreos for the authentic flavor, but feel free to get creative with variations like double stuff or mint Oreos if that’s more your style.
- 1 tsp vanilla extract: A touch of vanilla helps to bring out the sweetness and richness of the ice cream and Oreos.
- Whipped cream (optional, for topping): Because who doesn’t love a big swirl of whipped cream on top of a milkshake? This is completely optional, but I highly recommend it for extra decadence.
Instructions
Step 1: Add the Ice Cream and Milk to the Blender
Start by scooping the vanilla ice cream into your blender. I like to use about 4 big scoops, but you can adjust depending on how thick or creamy you want your milkshake. Add the whole milk to the blender. The milk is what will help loosen up the ice cream, making it easier to blend.
Tip: If you want a thicker milkshake, reduce the milk a bit, or if you prefer a thinner consistency, add a little more milk. There’s no right or wrong here!
Step 2: Add the Oreos
Next, it’s time to add the star ingredient—Oreos! I usually add about 10-12 cookies, but feel free to throw in more if you want an extra-cookie flavor. You can break the Oreos in half or just toss them in whole—the blender will take care of them.
Tip: If you like some larger Oreo chunks in your milkshake, pulse the blender a few times before blending it all the way. If you want a smooth milkshake, blend until everything is completely mixed.
Step 3: Blend It All Together
Put the lid on your blender and blend everything until smooth. Start on a lower speed, and gradually increase to high to ensure everything is blended evenly. You should have a creamy, milkshake consistency with small cookie crumbs dispersed throughout.
Tip: Don’t be afraid to stop the blender and scrape down the sides if some of the ice cream gets stuck. A quick pause helps everything blend more smoothly.
Step 4: Taste and Adjust
Give your milkshake a quick taste. If you want more vanilla flavor, add a little more vanilla extract. If you want more Oreo crunch, toss in a few extra cookies. Taste-testing is one of the best parts!
Step 5: Serve and Garnish
Pour the milkshake into glasses and top with a generous swirl of whipped cream (optional, but oh-so-delicious). If you’re feeling extra fancy, drizzle some chocolate syrup inside the glasses before pouring the milkshake for a fun presentation. You can also sprinkle extra crushed Oreos on top for some added texture.
Nutrition
- Serving Size: 3
- Calories: 500
- Fat: 25g
- Carbohydrates: 70g
- Protein: 6g
Conclusion
And there you have it, the ultimate Oreo Milkshake recipe that’s sure to become your new favorite treat! With just a handful of ingredients, you can whip up this decadent, creamy drink that’s as easy as it is delicious. Whether you’re having a chill night in or celebrating something special, this Oreo milkshake is perfect for any occasion.
The combination of crunchy Oreos, rich vanilla ice cream, and creamy milk makes this drink irresistibly good, and the best part is how customizable it is. From adding extra toppings to experimenting with different flavors, you can make it your own.
So next time you’re craving something sweet, why not treat yourself to this Oreo milkshake? It’s bound to bring a smile to your face with every sip. Happy blending, and enjoy your creamy, cookie-filled indulgence!
If you make this milkshake, don’t forget to share your creation with me. I’d love to see how it turns out. Cheers to delicious milkshakes and sweet moments!

