Introduction
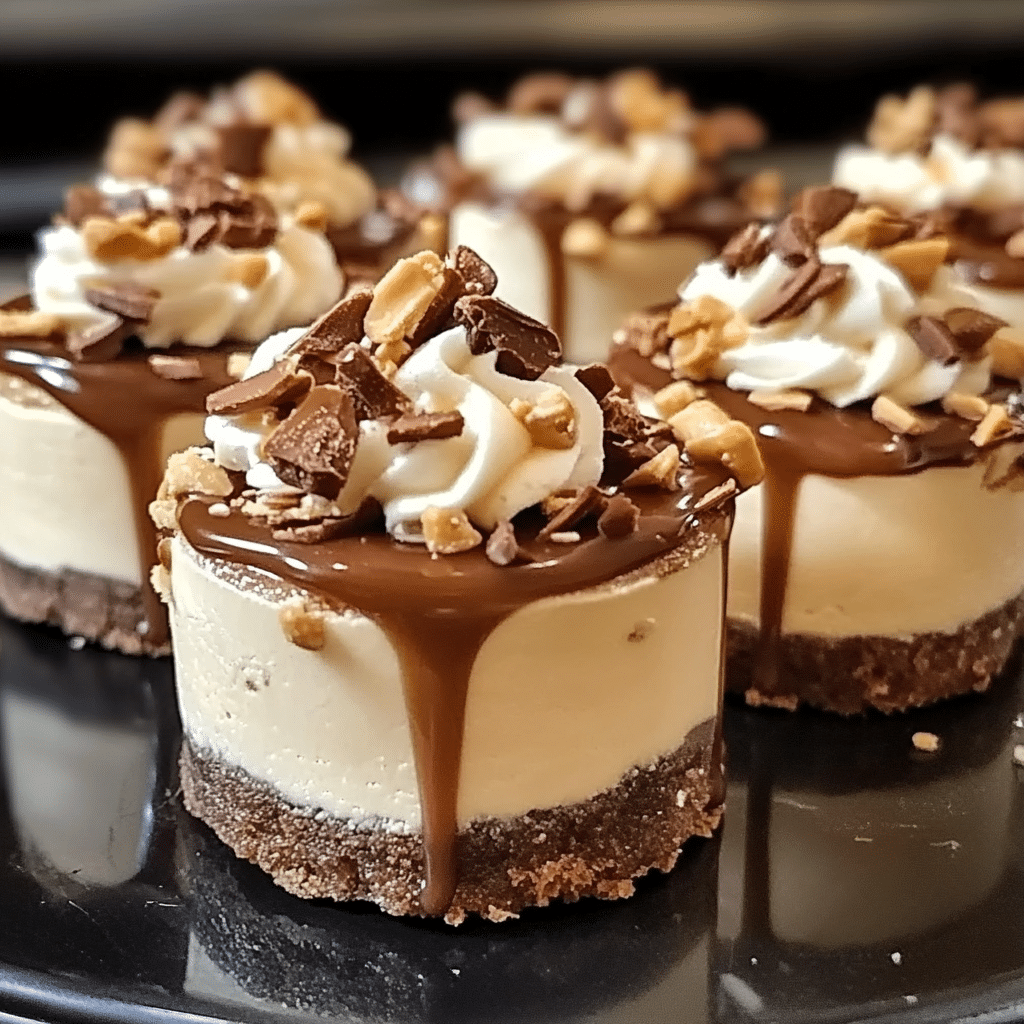
There’s something magical about the combination of chocolate, caramel, and nuts that makes it feel like an indulgent treat without being too overwhelming. That’s why turtle candies have been a favorite for generations, right? And when you turn those flavors into mini cheesecakes, it’s like taking a bite of pure dessert bliss. Welcome to these No Bake Turtle Mini Cheesecakes!
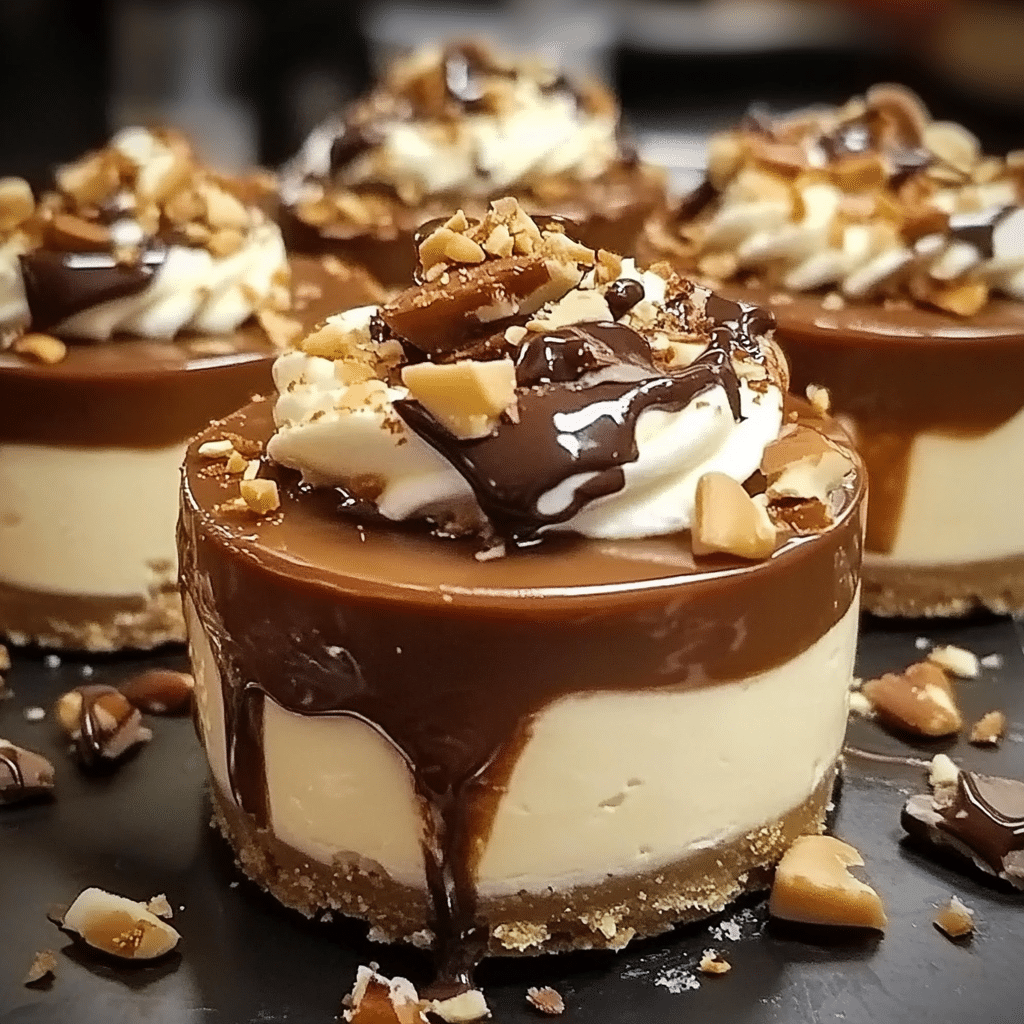
I’ve always had a soft spot for no-bake desserts. They’re so easy to throw together, and they don’t require turning on the oven—which is perfect for hot days or when I just can’t be bothered with complicated steps. The best part about these mini cheesecakes is how quick they come together. With a buttery graham cracker crust, a smooth, creamy cheesecake filling, and a decadent topping of melted caramel, chocolate, and toasted pecans, these little treats are guaranteed to wow any crowd.
Whenever I make these, I feel like I’m treating my family to something special, but it’s so simple. I often make these for parties, but they’re also perfect for a little self-care night. (You deserve it, right?) Plus, I love how each mini cheesecake feels like an individual treat, so everyone gets their own little bite of heaven.
Why You’ll Love This Recipe
Here’s why these No Bake Turtle Mini Cheesecakes are going to become your new favorite dessert:
- No-Bake Simplicity: You don’t need to turn on the oven, which means this dessert is perfect for summer days or when you’re short on time.
- Rich, Decadent Flavor: These mini cheesecakes are a glorious balance of creamy, tangy cheesecake, rich caramel, and smooth chocolate, all topped off with crunchy toasted pecans.
- Perfect for Sharing: They’re easy to portion out, making them ideal for parties, family gatherings, or just a fun treat to share with friends.
- Make Ahead: You can prep these ahead of time and let them chill in the fridge, so they’re ready whenever you need them. The longer they set, the better they taste!
These turtle mini cheesecakes are sure to become a go-to when you want something sweet, but you don’t want to spend hours in the kitchen. With their irresistible combination of textures and flavors, it’s no wonder this recipe is one of my absolute favorites.
Preparation Time and Servings
- Total Time: 25 minutes (plus 2 hours chilling time)
- Servings: This recipe makes about 12 mini cheesecakes, perfect for sharing with family and friends.
Nutrition Facts (per cheesecake):
- Calories: 350
- Protein: 5g
- Carbs: 32g
- Fat: 24g
Ingredients
Here’s what you’ll need for these No Bake Turtle Mini Cheesecakes:
Crust:
- 1 1/2 cups graham cracker crumbs: This forms the base and gives that delicious crunch.
- 1/4 cup sugar: Sweetens up the crust, balancing the rich filling.
- 1/2 cup unsalted butter (melted): Helps bind the crust together and gives it a rich, buttery flavor.
Cheesecake Filling:
- 16 oz cream cheese (softened): The star of the show! Make sure it’s softened so you get a smooth, creamy filling.
- 1/2 cup powdered sugar: Adds sweetness without being too overpowering.
- 1 tsp vanilla extract: For that classic, comforting flavor.
- 1 cup heavy cream: This makes the filling rich and fluffy. You’ll whip it up to make it light and airy.
Topping:
- 1/2 cup caramel sauce (store-bought or homemade): Drizzle this over the top for that indulgent caramel flavor.
- 1/2 cup semisweet chocolate chips: Melted for a smooth, glossy topping.
- 1/2 cup pecans (toasted and chopped): Adds a satisfying crunch and that classic turtle candy flavor.
Step-by-Step Instructions
Let’s break this recipe down into easy-to-follow steps:
1. Prepare the Crust:
- In a large mixing bowl, combine the graham cracker crumbs, sugar, and melted butter. Mix everything together until the crumbs are fully coated in butter and the mixture sticks together when pressed.
- Spoon the mixture into the bottom of a 12-cup muffin tin or mini cheesecake pan. Use the back of a spoon or your fingers to gently press the mixture down, creating a flat, compact crust in each muffin cup.
- Place the crusts in the refrigerator to chill for about 10-15 minutes. This helps the butter firm up and keeps the crust from falling apart when you add the filling.
2. Make the Cheesecake Filling:
- In a large mixing bowl, beat the softened cream cheese with an electric mixer until smooth and creamy. You want to make sure there are no lumps, so take your time with this step!
- Add the powdered sugar and vanilla extract to the cream cheese and continue beating until fully combined.
- In a separate bowl, whip the heavy cream until stiff peaks form (this usually takes about 2-3 minutes with a hand mixer). Once the cream is whipped, gently fold it into the cream cheese mixture. Be careful not to deflate the whipped cream—just fold until everything is combined.
- Once the cheesecake filling is smooth and fluffy, spoon or pipe it onto the chilled graham cracker crusts. Smooth the tops with a spoon or offset spatula.
- Return the cheesecakes to the refrigerator and let them chill for at least 2 hours, or until firm. This gives the filling time to set and firm up.
3. Prepare the Toppings:
- While the cheesecakes are chilling, toast the pecans. Place them in a dry skillet over medium heat and toast for about 3-4 minutes, shaking the pan occasionally to prevent burning. You’ll know they’re ready when they’re fragrant and slightly browned.
- Once toasted, remove the pecans from the pan, let them cool, and chop them coarsely.
4. Assemble the Turtle Topping:
- When the cheesecakes are fully set, it’s time to add the toppings! Drizzle each mini cheesecake with caramel sauce, making sure to cover the top evenly.
- Next, melt the chocolate chips. You can do this by microwaving them in 20-second intervals, stirring between each interval until they’re fully melted and smooth.
- Drizzle the melted chocolate over the caramel layer, making sure to coat it evenly. You can also create a marbled effect by lightly swirling the chocolate into the caramel.
- Finally, sprinkle the toasted pecans over the top of each mini cheesecake. You want just enough to add a nice crunch but not overpower the other flavors.
5. Chill and Serve:
- After assembling the cheesecakes, return them to the fridge for another 30 minutes to allow the toppings to firm up.
- Serve the cheesecakes chilled, and enjoy the sweet, crunchy, and creamy goodness of these no-bake turtle treats!
How to Serve
These No Bake Turtle Mini Cheesecakes are best served chilled straight from the fridge. Here are a few serving ideas to elevate your dessert:
- Serve with a dollop of whipped cream for extra creaminess and sweetness.
- Pair with a cup of coffee or iced tea to balance out the rich flavors of the cheesecake.
- Enjoy with a side of fresh berries for a pop of color and freshness.
- For a party, serve on a decorative platter with a few extra caramel and chocolate drizzles to make them look extra fancy.
Additional Tips
Here are a few tips to help make your No Bake Turtle Mini Cheesecakes even better:
- Use Full-Fat Cream Cheese: For the best flavor and texture, use full-fat cream cheese. The lower-fat versions may not yield as creamy a texture.
- Chill the Cheesecakes Long Enough: Make sure to chill the cheesecakes for at least 2 hours before adding the toppings. This ensures the filling sets properly.
- Customize the Crust: If you’re not a fan of graham crackers, try using crushed Oreos, Nilla wafers, or even gingersnap cookies for a unique twist.
- Toasting Pecans: Don’t skip the step of toasting the pecans—it really brings out their flavor and adds a satisfying crunch.
- Make Them Ahead of Time: These mini cheesecakes are great for prepping ahead of time. Make them the night before, and they’ll be ready to serve when you need them.
Recipe Variations
Feel free to get creative with these mini cheesecakes! Here are some variations you can try:
- Chocolate Lovers: Add a layer of chocolate ganache between the crust and the cheesecake filling for an extra chocolatey surprise.
- Gluten-Free Option: Use gluten-free graham crackers or another gluten-free cookie for the crust.
- Nut-Free Version: If you have nut allergies or just prefer no nuts, skip the pecans and top with extra chocolate or crushed cookies for crunch.
- Different Sauces: Swap the caramel for butterscotch or a raspberry sauce for a fruity twist.
- Mini Tarts: Instead of mini cheesecakes, try using tart pans for individual servings with a beautiful fluted edge.
No matter how you make them, these turtle mini cheesecakes are sure to impress!
FAQ: No Bake Turtle Mini Cheesecakes
1. Can I make these cheesecakes ahead of time?
Absolutely! These No Bake Turtle Mini Cheesecakes are perfect for prepping in advance. You can make the crust, filling, and toppings a day or two ahead of time and store them in the fridge. Just be sure to cover them tightly with plastic wrap or foil to keep them fresh. The longer they chill, the better they taste!
2. How do I store leftover mini cheesecakes?
Leftover mini cheesecakes should be stored in an airtight container in the refrigerator. They’ll stay fresh for up to 3-4 days. If you want to keep them for longer, you can freeze them! Just be sure to wrap each cheesecake individually in plastic wrap and then place them in a freezer-safe container. Thaw them in the fridge for a few hours before serving.
3. Can I use a different type of nut?
Yes, you can! While pecans are the traditional nut for turtle candy, you can swap them for other nuts like walnuts, almonds, or cashews if you prefer. Just make sure to toast them first for added flavor and crunch.
4. What if I don’t have a muffin tin or mini cheesecake pan?
If you don’t have a muffin tin or mini cheesecake pan, you can make these cheesecakes in a regular cupcake pan with cupcake liners. Alternatively, you can use a tart pan or even a baking dish and cut them into squares after they’ve set. Just be sure to adjust the chill time as needed to ensure they set properly.
5. Can I make the crust without butter?
Butter helps bind the crust together, but if you’re looking for a butter-free option, you can use coconut oil, vegetable oil, or even a bit of heavy cream as a substitute. You can also try using a nut butter (like peanut butter or almond butter) for a slightly different flavor profile.
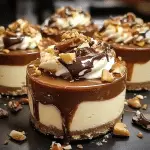
No Bake Turtle Mini Cheesecakes
- Total Time: 25 minutes
Ingredients
For the Crust:
- 1 1/2 cups graham cracker crumbs: This forms the base and gives that delicious crunch.
- 1/4 cup sugar: Sweetens up the crust, balancing the rich filling.
- 1/2 cup unsalted butter (melted): Helps bind the crust together and gives it a rich, buttery flavor.
For the Cheesecake Filling:
- 16 oz cream cheese (softened): The star of the show! Make sure it’s softened so you get a smooth, creamy filling.
- 1/2 cup powdered sugar: Adds sweetness without being too overpowering.
- 1 tsp vanilla extract: For that classic, comforting flavor.
- 1 cup heavy cream: This makes the filling rich and fluffy. You’ll whip it up to make it light and airy.
For the Topping:
- 1/2 cup caramel sauce (store-bought or homemade): Drizzle this over the top for that indulgent caramel flavor.
- 1/2 cup semisweet chocolate chips: Melted for a smooth, glossy topping.
- 1/2 cup pecans (toasted and chopped): Adds a satisfying crunch and that classic turtle candy flavor.
Instructions
1. Prepare the Crust:
- In a large mixing bowl, combine the graham cracker crumbs, sugar, and melted butter. Mix everything together until the crumbs are fully coated in butter and the mixture sticks together when pressed.
- Spoon the mixture into the bottom of a 12-cup muffin tin or mini cheesecake pan. Use the back of a spoon or your fingers to gently press the mixture down, creating a flat, compact crust in each muffin cup.
- Place the crusts in the refrigerator to chill for about 10-15 minutes. This helps the butter firm up and keeps the crust from falling apart when you add the filling.
2. Make the Cheesecake Filling:
- In a large mixing bowl, beat the softened cream cheese with an electric mixer until smooth and creamy. You want to make sure there are no lumps, so take your time with this step!
- Add the powdered sugar and vanilla extract to the cream cheese and continue beating until fully combined.
- In a separate bowl, whip the heavy cream until stiff peaks form (this usually takes about 2-3 minutes with a hand mixer). Once the cream is whipped, gently fold it into the cream cheese mixture. Be careful not to deflate the whipped cream—just fold until everything is combined.
- Once the cheesecake filling is smooth and fluffy, spoon or pipe it onto the chilled graham cracker crusts. Smooth the tops with a spoon or offset spatula.
- Return the cheesecakes to the refrigerator and let them chill for at least 2 hours, or until firm. This gives the filling time to set and firm up.
3. Prepare the Toppings:
- While the cheesecakes are chilling, toast the pecans. Place them in a dry skillet over medium heat and toast for about 3-4 minutes, shaking the pan occasionally to prevent burning. You’ll know they’re ready when they’re fragrant and slightly browned.
- Once toasted, remove the pecans from the pan, let them cool, and chop them coarsely.
4. Assemble the Turtle Topping:
- When the cheesecakes are fully set, it’s time to add the toppings! Drizzle each mini cheesecake with caramel sauce, making sure to cover the top evenly.
- Next, melt the chocolate chips. You can do this by microwaving them in 20-second intervals, stirring between each interval until they’re fully melted and smooth.
- Drizzle the melted chocolate over the caramel layer, making sure to coat it evenly. You can also create a marbled effect by lightly swirling the chocolate into the caramel.
- Finally, sprinkle the toasted pecans over the top of each mini cheesecake. You want just enough to add a nice crunch but not overpower the other flavors.
5. Chill and Serve:
- After assembling the cheesecakes, return them to the fridge for another 30 minutes to allow the toppings to firm up.
- Serve the cheesecakes chilled, and enjoy the sweet, crunchy, and creamy goodness of these no-bake turtle treats!
Nutrition
- Serving Size: 12
- Calories: 350
- Fat: 24g
- Carbohydrates: 32g
- Protein: 5g
Conclusion
These No Bake Turtle Mini Cheesecakes are a perfect combination of sweet, salty, creamy, and crunchy—all packed into one little bite. Whether you’re hosting a party, bringing dessert to a family gathering, or just want to treat yourself (and let’s be honest, you deserve it), these cheesecakes are the way to go. They come together quickly, and the no-bake aspect makes them so much easier than traditional cheesecakes.
Plus, the turtle candy-inspired flavors of chocolate, caramel, and pecans will have everyone asking for the recipe. They’re rich, decadent, and completely irresistible—what more could you ask for? Try them today and discover just how easy it is to make a dessert that feels like a special occasion.
If you’re looking for more quick and easy desserts that pack a punch, be sure to check out my other no-bake treats. Enjoy, and don’t forget to savor every bite!

