Introduction
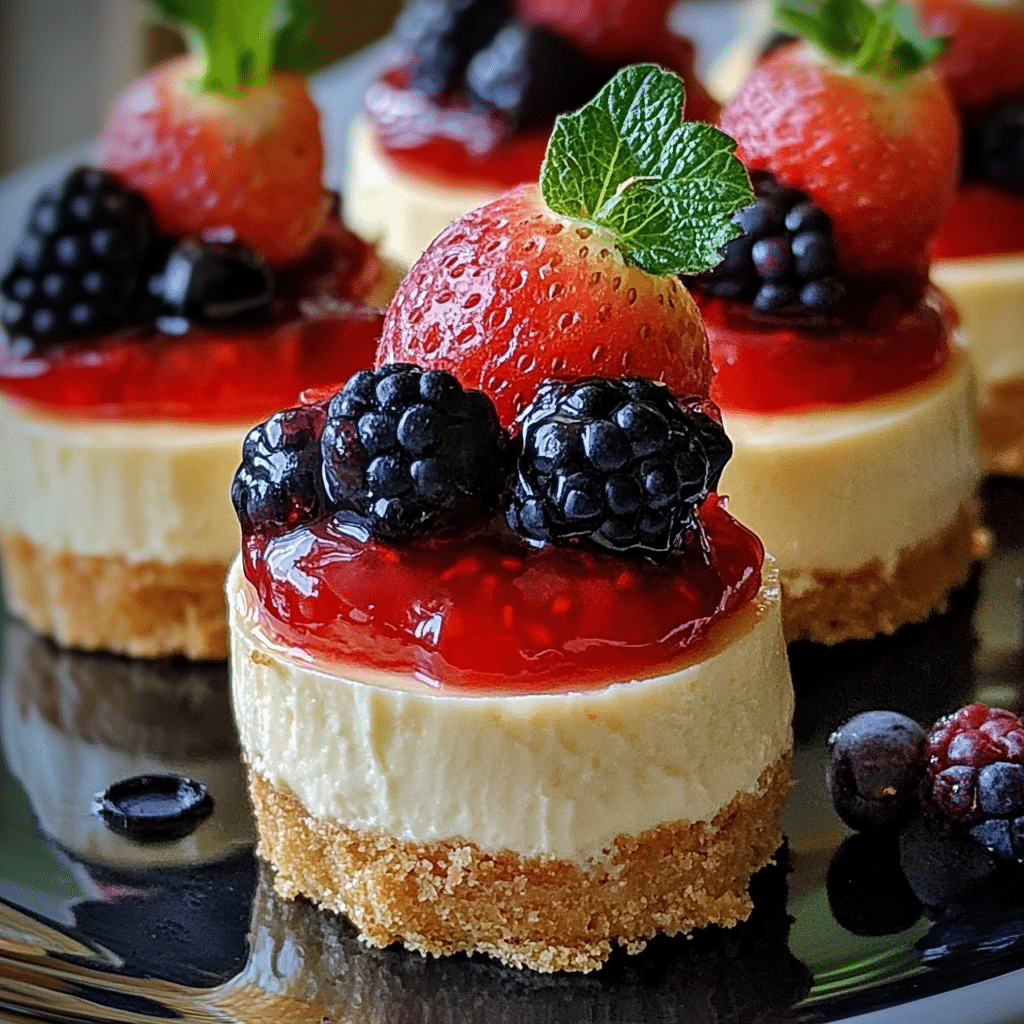
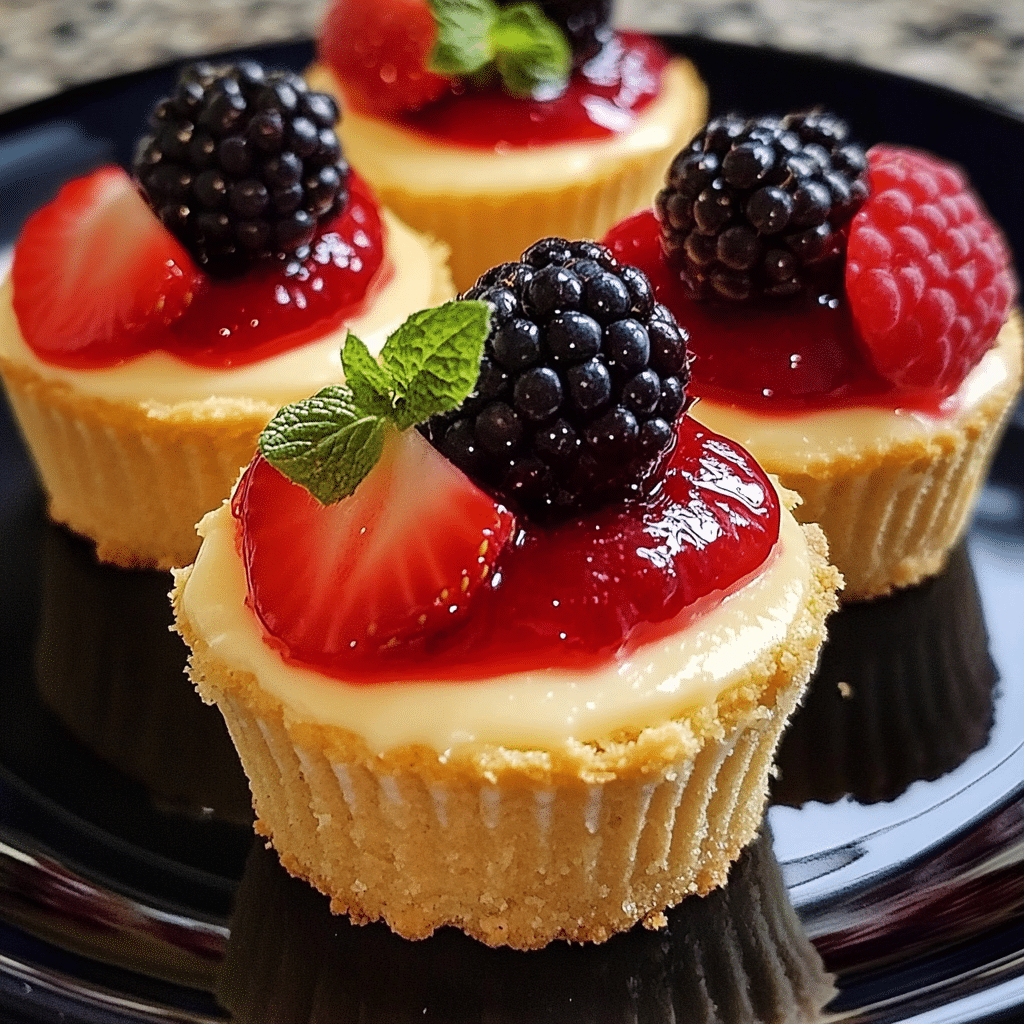
If you’ve ever had one of those days where you just need a sweet little treat to brighten your mood, these Fruity Mini Cheesecakes are exactly what you need. They’re like little bites of heaven, with a rich, creamy cheesecake filling topped with your favorite fresh fruits. Plus, they’re mini, so it’s totally okay to have more than one, right? I mean, who doesn’t love a little indulgence that’s just the right size?
I first came up with this recipe when I was trying to make a dessert that was both elegant and easy to serve at a family gathering. I love cheesecake, but sometimes the idea of making a full-sized cheesecake just feels like too much work. Enter the mini cheesecake—a much simpler, bite-sized version of my favorite dessert, with the added bonus of fresh fruit to make it feel extra refreshing.
What makes these mini cheesecakes so special is how the tangy, rich filling pairs perfectly with the sweet and tart fruit toppings. Whether it’s juicy berries, tropical mangoes, or a medley of both, these cheesecakes are a little bit of everything: creamy, sweet, and just the right amount of tang. Plus, you can get creative with the fruit toppings depending on what’s in season or what you’re craving that day.
Why You’ll Love This Recipe
These Fruity Mini Cheesecakes are the perfect dessert for so many reasons:
- Easy to Make: No need to worry about mastering a huge cheesecake. These mini cheesecakes are baked in muffin tins, which makes them easy to prepare and serve. Plus, they’re no-fuss—no need to worry about cracks or a water bath like you would with a traditional cheesecake.
- Customizable: The best part? You can swap out the fruits depending on what you like! Strawberries, blueberries, raspberries, kiwi, or even tropical fruits like mango and pineapple—each one brings a different flavor, so feel free to get creative with the toppings.
- Perfectly Portion-Controlled: Sometimes it’s hard to stop at just one slice of cheesecake, but these mini versions solve that problem. They’re bite-sized and just the right amount of indulgence.
The creamy, tangy cheesecake filling combined with the burst of juicy fruit makes each bite absolutely perfect. They’re rich, but not overly heavy—making them ideal for any occasion, from birthday parties to casual family gatherings.
Preparation Time and Servings
- Total Time: 3 hours (includes chilling time)
- Servings: This recipe makes about 12 mini cheesecakes (you can easily double the recipe if you’re feeding a crowd).
Nutrition Facts (per serving):
- Calories: 280
- Protein: 4g
- Carbs: 32g
- Fat: 18g
Ingredients
Here’s everything you need to make these delicious mini cheesecakes:
- 1 1/2 cups graham cracker crumbs: This forms the base of the cheesecake, providing that classic, buttery crust.
- 1/4 cup granulated sugar: For a little sweetness in the crust.
- 1/2 cup unsalted butter (melted): To bind the crust together and give it that delicious buttery flavor.
- 16 oz cream cheese (softened): This is the base of the cheesecake filling. It gives the cheesecake that rich, creamy texture.
- 1/2 cup granulated sugar: To sweeten the filling just enough.
- 2 large eggs: Helps the filling set up perfectly.
- 1 tsp vanilla extract: A must for that lovely, warm vanilla flavor.
- 1/2 cup sour cream: Adds richness and a little tang to the filling.
- Fresh fruit for topping (such as strawberries, blueberries, or a mix of your favorites): For the crowning touch, adding freshness and color to each mini cheesecake.
Optional: You can also use fruit preserves or jams if fresh fruit isn’t available. Just be sure to spread it gently on top after the cheesecakes have cooled.
Step-by-Step Instructions
Let’s break down the process into simple steps:
1. Prepare the Crust
- Preheat your oven to 325°F (163°C). Line a muffin tin with cupcake liners.
- In a medium-sized bowl, combine the graham cracker crumbs and sugar. Pour in the melted butter and mix until everything is well coated.
- Spoon about a tablespoon of the crumb mixture into each muffin cup. Press down firmly with the back of a spoon or your fingers to create a compact, even crust.
- Bake the crusts in the preheated oven for about 8-10 minutes, or until golden and fragrant. Once they’re done, let them cool while you prepare the cheesecake filling.
2. Make the Cheesecake Filling
- In a large mixing bowl, beat the cream cheese with a hand mixer or stand mixer until smooth and creamy. This should take about 2-3 minutes.
- Add the sugar and beat until combined.
- Beat in the eggs one at a time, making sure each egg is fully incorporated before adding the next.
- Stir in the vanilla extract and sour cream, mixing until smooth and creamy.
- At this point, the cheesecake filling should be thick and velvety, with no lumps.
3. Assemble the Mini Cheesecakes
- Spoon the cheesecake filling into each muffin cup over the cooled graham cracker crusts, filling each about 3/4 of the way full.
- Smooth the tops with the back of a spoon or an offset spatula.
- Bake in the preheated oven for 18-20 minutes, or until the cheesecakes are set but still slightly jiggly in the center. They will firm up as they cool.
- Once baked, remove the mini cheesecakes from the oven and let them cool in the tin for 10 minutes. Afterward, transfer them to a wire rack to cool completely.
4. Chill the Cheesecakes
- Once the mini cheesecakes have cooled to room temperature, cover them loosely with plastic wrap or foil and refrigerate for at least 2 hours, or overnight if you have the time. This chilling time is essential for the cheesecakes to set properly.
5. Add the Fruit Toppings
- Once the cheesecakes are chilled, it’s time for the fun part—topping them with fresh fruit!
- Arrange your fresh fruit on top of each mini cheesecake just before serving. You can mix and match your favorite fruits or stick with one variety for a simple, elegant look.
- If you prefer, you can also drizzle a bit of fruit syrup or jam over the top for extra sweetness.
How to Serve
- Serve the mini cheesecakes as a standalone treat or pair them with a light side dish like a fresh salad to balance out the richness of the dessert.
- They’re perfect for a summer picnic, birthday party, or family dinner. You can even make them ahead of time and store them in the fridge until you’re ready to serve.
- For an extra touch, garnish with a sprig of mint or a dusting of powdered sugar right before serving. It adds a little elegance and freshness to the dish.
Additional Tips
- Use Room Temperature Cream Cheese: This ensures a smooth, lump-free filling. If your cream cheese is too cold, it can be harder to beat and may result in a bumpy texture.
- Don’t Overbake: The mini cheesecakes are done when they’re set but still slightly wobbly in the middle. Overbaking can lead to dry, cracked cheesecakes.
- Chill Overnight: For the best texture, let the cheesecakes chill in the fridge overnight. This gives them time to fully set and develop a rich, creamy texture.
- Fruit Topping Variations: Use whatever fresh fruit is in season—mango, peaches, kiwi, and berries all work wonderfully! You can even mix fruit preserves or fruit compote into the cheesecake filling for an added flavor twist.
- Add a Drizzle: If you want a bit of extra sweetness, drizzle some fruit syrup, honey, or caramel over the top before serving.
Recipe Variations
- Chocolate-Covered Mini Cheesecakes: For chocolate lovers, swap out the graham cracker crust for an Oreo crust and drizzle with melted chocolate after adding the fruit.
- Lemon Blueberry Cheesecakes: Add a bit of lemon zest to the cheesecake filling for a tangy twist. Top with fresh blueberries and a drizzle of honey for a sweet, citrusy bite.
- No-Bake Mini Cheesecakes: If you don’t want to turn on the oven, simply skip the baking step. Make a no-bake cheesecake filling by using whipped cream and cream cheese and chill the cheesecakes overnight.
- Nutty Crust: Add finely chopped nuts like almonds, pecans, or walnuts to the crust for extra crunch and flavor.
Frequently Asked Questions (FAQ)
1. Can I make these mini cheesecakes ahead of time?
Yes! In fact, making them ahead of time is a great idea. These mini cheesecakes need to chill for at least 2 hours, but overnight is even better. Just prepare them the day before your event or gathering, refrigerate them, and top with fresh fruit right before serving. This makes them a perfect make-ahead dessert!
2. Can I use frozen fruit for the toppings?
While fresh fruit is ideal for topping these cheesecakes, you can definitely use frozen fruit if fresh isn’t available. Just be sure to thaw and drain the frozen fruit before using it, as excess moisture could affect the texture of your cheesecakes. You can also make a quick fruit compote by gently simmering the frozen fruit with a bit of sugar for a delicious syrup to drizzle on top.
3. What can I substitute for graham crackers in the crust?
If you’re not a fan of graham crackers or want a gluten-free option, you can substitute the graham cracker crumbs with crushed cookies like Oreos, vanilla wafers, or even gluten-free biscuits. For a nutty option, try using crushed almonds, pecans, or hazelnuts mixed with a little sugar and butter.
4. Can I use low-fat or fat-free cream cheese?
You can use low-fat or fat-free cream cheese, but keep in mind that the texture might be slightly different. Full-fat cream cheese gives the cheesecake a rich, creamy texture, while reduced-fat versions may result in a slightly lighter, less creamy filling. However, they will still taste delicious!
5. How do I store leftover mini cheesecakes?
Store any leftover mini cheesecakes in an airtight container in the refrigerator for up to 3 days. If you want to freeze them, wrap them tightly in plastic wrap and foil, then place them in a freezer-safe container. They can be frozen for up to 3 months. To thaw, place them in the refrigerator overnight and add fresh fruit just before serving.
Fruity Mini Cheesecakes
- Total Time: 3 hours
Ingredients
- 1 1/2 cups graham cracker crumbs: This forms the base of the cheesecake, providing that classic, buttery crust.
- 1/4 cup granulated sugar: For a little sweetness in the crust.
- 1/2 cup unsalted butter (melted): To bind the crust together and give it that delicious buttery flavor.
- 16 oz cream cheese (softened): This is the base of the cheesecake filling. It gives the cheesecake that rich, creamy texture.
- 1/2 cup granulated sugar: To sweeten the filling just enough.
- 2 large eggs: Helps the filling set up perfectly.
- 1 tsp vanilla extract: A must for that lovely, warm vanilla flavor.
- 1/2 cup sour cream: Adds richness and a little tang to the filling.
- Fresh fruit for topping (such as strawberries, blueberries, or a mix of your favorites): For the crowning touch, adding freshness and color to each mini cheesecake.
Instructions
1. Prepare the Crust
- Preheat your oven to 325°F (163°C). Line a muffin tin with cupcake liners.
- In a medium-sized bowl, combine the graham cracker crumbs and sugar. Pour in the melted butter and mix until everything is well coated.
- Spoon about a tablespoon of the crumb mixture into each muffin cup. Press down firmly with the back of a spoon or your fingers to create a compact, even crust.
- Bake the crusts in the preheated oven for about 8-10 minutes, or until golden and fragrant. Once they’re done, let them cool while you prepare the cheesecake filling.
2. Make the Cheesecake Filling
- In a large mixing bowl, beat the cream cheese with a hand mixer or stand mixer until smooth and creamy. This should take about 2-3 minutes.
- Add the sugar and beat until combined.
- Beat in the eggs one at a time, making sure each egg is fully incorporated before adding the next.
- Stir in the vanilla extract and sour cream, mixing until smooth and creamy.
- At this point, the cheesecake filling should be thick and velvety, with no lumps.
3. Assemble the Mini Cheesecakes
- Spoon the cheesecake filling into each muffin cup over the cooled graham cracker crusts, filling each about 3/4 of the way full.
- Smooth the tops with the back of a spoon or an offset spatula.
- Bake in the preheated oven for 18-20 minutes, or until the cheesecakes are set but still slightly jiggly in the center. They will firm up as they cool.
- Once baked, remove the mini cheesecakes from the oven and let them cool in the tin for 10 minutes. Afterward, transfer them to a wire rack to cool completely.
4. Chill the Cheesecakes
- Once the mini cheesecakes have cooled to room temperature, cover them loosely with plastic wrap or foil and refrigerate for at least 2 hours, or overnight if you have the time. This chilling time is essential for the cheesecakes to set properly.
5. Add the Fruit Toppings
- Once the cheesecakes are chilled, it’s time for the fun part—topping them with fresh fruit!
- Arrange your fresh fruit on top of each mini cheesecake just before serving. You can mix and match your favorite fruits or stick with one variety for a simple, elegant look.
- If you prefer, you can also drizzle a bit of fruit syrup or jam over the top for extra sweetness.
Nutrition
- Serving Size: 12
- Calories: 280
- Fat: 18g
- Carbohydrates: 32g
- Protein: 4g
Conclusion
These Fruity Mini Cheesecakes are a fun, refreshing twist on a classic dessert. Whether you’re serving them at a party, for a family gathering, or just because you want a little indulgence, these mini cheesecakes are sure to steal the show. Their creamy filling, paired with a crisp graham cracker crust and topped with fresh, juicy fruit, makes for a dessert that’s as delicious as it is pretty.
The best part? You can make them ahead of time, customize them with your favorite fruit, and impress your guests with a dessert that looks and tastes like you spent hours in the kitchen (but really, it’s so easy!). So go ahead, take a bite, and enjoy the sweet, creamy goodness of these fruity little cheesecakes.

