Introduction
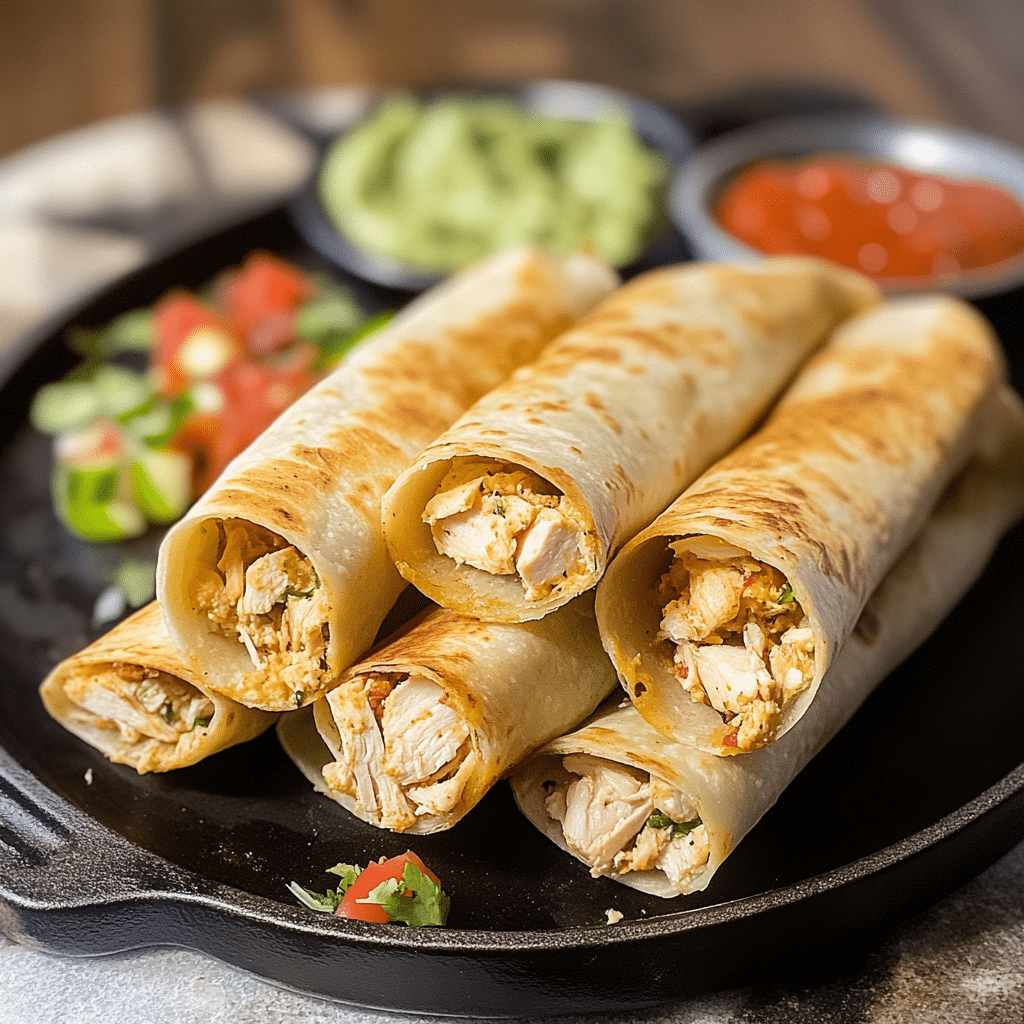
Taquitos are a favorite in my household for so many reasons. They’re crispy, flavorful, and just plain fun to eat—especially when dipped into salsa or guacamole. The first time I made these gluten-free chicken taquitos, I was looking for a quick snack for a family movie night, and they were such a hit that they’ve since become a staple in our weekly meal rotation.
What I love most about this recipe is how versatile it is. Not only are these taquitos naturally gluten-free thanks to the corn tortillas, but you can also make them ahead of time and freeze them for a busy day when you need something quick. Plus, you can easily switch up the filling to suit your mood—whether it’s adding a bit of spice, extra cheese, or even switching out the chicken for beef or beans.
With just a handful of ingredients, you’ll have these tasty, crunchy taquitos ready to serve in no time. And don’t worry if you’ve never made taquitos before—this recipe is super beginner-friendly and I’ll guide you through each step with tips and tricks to ensure they turn out perfectly.
Why You’ll Love This Recipe
There so many reason to love this Easy Gluten Free Chicken Taquitos:
- Naturally Gluten-Free: Corn tortillas keep this dish gluten-free without sacrificing any of the crunch and flavor you expect from taquitos.
- Super Simple: Made with just a few ingredients that you likely already have in your pantry or fridge, this recipe is incredibly easy to prepare.
- Customizable: This chicken taquito recipe is versatile—you can add more or less spice, throw in some veggies, or even substitute with other proteins like shredded beef or pork.
- Family-Friendly: Perfect for kids and adults alike. My family loves eating these with their favorite dips—guacamole, sour cream, or salsa.
- Make-Ahead and Freezer Friendly: You can make a big batch, freeze them, and just pop them in the oven whenever you need a quick meal or snack. They reheat beautifully!
The balance of tender chicken inside and the crispy exterior makes these taquitos a total crowd-pleaser. The cheesy, savory filling is tucked inside a tortilla that crisps up perfectly when baked or fried—no one will believe they’re gluten-free!
Preparation Time and Servings
- Total Time: 35-40 minutes (15 minutes prep, 20-25 minutes cook time)
- Servings: Makes about 12 taquitos
- Calories: Approximately 200 calories per taquito
- Protein: 15g per serving
- Carbs: 12g per serving
Ingredients
Here’s what you’ll need to make these gluten-free chicken taquitos:
- 2 cups shredded cooked chicken (leftover rotisserie chicken works great!)
- 1 cup shredded cheddar cheese (or any melty cheese of your choice)
- 1/4 cup cream cheese, softened
- 1/4 cup sour cream
- 1 tsp cumin
- 1/2 tsp smoked paprika
- 1/4 tsp garlic powder
- 1/4 tsp onion powder
- Salt and pepper to taste
- 12 small gluten-free corn tortillas (6-inch size works best)
- Olive oil or cooking spray for brushing the tortillas
Optional Ingredients:
- 1 jalapeño, finely chopped (if you like it spicy!)
- 2 tbsp chopped cilantro for garnish
- Guacamole, salsa, or sour cream for dipping
Step-by-Step Instructions
Here’s how to make your very own Easy Gluten Free Chicken Taquitos from scratch:
1st Step: Preheat the oven
Preheat your oven to 400°F (200°C). Line a large baking sheet with parchment paper or a silicone baking mat to prevent sticking.
2nd Step: Make the Chicken Filling
In a large bowl, combine the shredded chicken, shredded cheddar cheese, cream cheese, sour cream, cumin, smoked paprika, garlic powder, onion powder, salt, and pepper. Mix everything together until well combined. The cream cheese and sour cream should make the filling nice and creamy while the spices add a ton of flavor.
Pro Tip: If you want to add a little heat to your taquitos, this is the time to throw in some chopped jalapeño or a sprinkle of red pepper flakes.
3rd Step: Warm the Tortillas
To prevent the corn tortillas from cracking when you roll them, you’ll want to warm them up. Place them in a microwave between two damp paper towels and heat for about 20-30 seconds until they’re pliable. Alternatively, you can lightly toast them in a dry skillet over medium heat for a few seconds on each side.
Pro Tip: Don’t skip this step! Warming the tortillas makes them much easier to work with and helps them stay intact during rolling.
4th Step: Fill and Roll the Taquitos
Now for the fun part! Take one warm tortilla and place about 2-3 tablespoons of the chicken mixture in a line down the center. Roll the tortilla up tightly, starting from one edge and rolling toward the other, creating a snug taquito. Place it seam-side down on your prepared baking sheet.
Repeat this process with the remaining tortillas and filling.
Pro Tip: Make sure the seam side of the taquito is down on the baking sheet so they hold together while baking.
5th Step: Brush with Olive Oil
Once all the taquitos are rolled and lined up on the baking sheet, lightly brush the tops with olive oil or spray them with cooking spray. This helps them get extra crispy in the oven.
6th Step: Bake the Taquitos
Bake the taquitos for 20-25 minutes, or until they’re golden brown and crispy. Keep an eye on them toward the end of the cooking time to make sure they don’t over-brown.
If you prefer a crispier finish, you can broil them for the last 2-3 minutes of cooking, but watch them carefully as they can burn quickly under the broiler.
7th Step: Serve and Enjoy!
Once they’re done, take them out of the oven and let them cool for a couple of minutes before serving. Garnish with fresh cilantro and serve them with your favorite dipping sauces—guacamole, salsa, and sour cream are all excellent options!
How to Serve
These taquitos are super versatile and can be served in a variety of ways:
- As a main dish: Serve alongside a light salad or rice and beans for a complete meal.
- As an appetizer: Perfect for a party platter with guacamole, salsa, and sour cream on the side.
- For kids: Pair them with a simple side of fresh fruit or veggies for a balanced meal.
No matter how you serve them, these gluten-free chicken taquitos are sure to be a hit!
Additional Tips
Here are some tips to help you nail this recipe every time:
- Warm the Tortillas: Don’t skip this step! Cold tortillas are likely to crack and fall apart when rolling, but a quick warm-up will make them pliable and easy to roll.
- Don’t Overfill: It can be tempting to add a lot of filling, but too much can make the taquitos burst open while baking. Stick to about 2-3 tablespoons per tortilla for the best results.
- Freeze for Later: If you want to prep these ahead of time, roll the taquitos and place them on a baking sheet in the freezer until solid. Then transfer them to a freezer bag. When ready to eat, bake directly from frozen—just add a few extra minutes to the cooking time.
- Use Rotisserie Chicken: Save time by using store-bought rotisserie chicken! It’s already cooked and seasoned, which makes this recipe even quicker to put together.
- Add More Veggies: If you want to sneak in some extra nutrition, you can add finely diced bell peppers, spinach, or even mashed sweet potatoes to the filling.
Recipe Variations
This gluten-free chicken taquito recipe is super customizable. Here are a few variations to try:
- Vegetarian Option: Swap out the chicken for a filling made of mashed black beans, sweet potatoes, or a combination of beans and rice.
- Spicy Chicken Taquitos: Add extra jalapeños, a dash of hot sauce, or a sprinkle of cayenne pepper to the chicken filling for some heat.
- Cheesy Taquitos: Add extra cheese to the filling for an even more indulgent, cheesy experience.
- Beef or Pork Taquitos: Replace the chicken with cooked ground beef or shredded pork for a different flavor profile.
- Dairy-Free: Substitute the cream cheese and sour cream with dairy-free alternatives to make this recipe completely dairy-free.
Freezing and Storage
These taquitos freeze beautifully, making them a great make-ahead meal.
- To Freeze: After rolling the taquitos but before baking, place them on a baking sheet and freeze until solid. Once frozen, transfer the taquitos to a freezer-safe bag or container. They’ll keep for up to 3 months.
- To Reheat: When ready to cook, bake directly from frozen. Simply add 5-10 minutes to the original baking time, keeping an eye on them to ensure they don’t burn.
Frequently Asked Questions (FAQ)
1. Can I use flour tortillas instead of corn tortillas?
No, flour tortillas contain gluten, so they aren’t suitable for a gluten-free diet. However, if you aren’t concerned about gluten, you can definitely use flour tortillas. Keep in mind that flour tortillas tend to be softer, so they won’t get as crispy as corn tortillas. If you want to keep the recipe gluten-free, be sure to stick with certified gluten-free corn tortillas.
2. What’s the best way to prevent corn tortillas from cracking?
Corn tortillas can sometimes crack when rolled, especially if they’re cold. To prevent this, warm the tortillas before filling and rolling them. You can microwave them between damp paper towels for about 20-30 seconds or lightly toast them in a dry skillet for a few seconds on each side. This will make them more pliable and less likely to break.
3. Can I make these taquitos ahead of time?
Absolutely! You can prepare the taquitos up to the point of rolling them, then freeze them unbaked. Once frozen, store them in an airtight container or freezer bag. When you’re ready to eat them, bake directly from frozen—just add 5-10 extra minutes to the baking time.
4. Can I air fry the taquitos instead of baking them?
Yes! Air frying is a great option if you want super crispy taquitos without deep frying. Preheat your air fryer to 400°F, spray the taquitos with a little cooking spray or brush with oil, and cook for 8-10 minutes, flipping halfway through. They’ll come out just as crispy as if they were deep-fried!
5. Can I make these taquitos dairy-free?
Yes, you can easily make this recipe dairy-free by using dairy-free cheese, cream cheese, and sour cream. There are plenty of great plant-based options available in most supermarkets. You can also skip the cream cheese and sour cream altogether and use mashed avocado or salsa as a creamy alternative in the filling.
6. What’s the best chicken to use for this recipe?
The easiest option is to use leftover rotisserie chicken, which is already cooked and flavorful. You can also use shredded chicken breast or thighs that you’ve cooked yourself, whether from poaching, baking, or even using a slow cooker. If you prefer dark meat, use chicken thighs for a juicier filling.
7. Can I add vegetables to the filling?
Yes! Feel free to add vegetables like diced bell peppers, onions, or spinach to the chicken filling. Just be sure to cook or sauté the vegetables beforehand, as raw veggies might release moisture while baking and make the taquitos soggy.
Print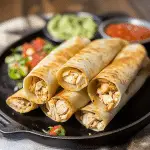
Easy Gluten Free Chicken Taquitos
- Total Time: 40 minutes
Ingredients
Here’s what you’ll need to make these gluten-free chicken taquitos:
- 2 cups shredded cooked chicken (leftover rotisserie chicken works great!)
- 1 cup shredded cheddar cheese (or any melty cheese of your choice)
- 1/4 cup cream cheese, softened
- 1/4 cup sour cream
- 1 tsp cumin
- 1/2 tsp smoked paprika
- 1/4 tsp garlic powder
- 1/4 tsp onion powder
- Salt and pepper to taste
- 12 small gluten-free corn tortillas (6-inch size works best)
- Olive oil or cooking spray for brushing the tortillas
Optional Ingredients:
- 1 jalapeño, finely chopped (if you like it spicy!)
- 2 tbsp chopped cilantro for garnish
- Guacamole, salsa, or sour cream for dipping
Instructions
Step 1: Preheat the oven
Preheat your oven to 400°F (200°C). Line a large baking sheet with parchment paper or a silicone baking mat to prevent sticking.
Step 2: Make the Chicken Filling
In a large bowl, combine the shredded chicken, shredded cheddar cheese, cream cheese, sour cream, cumin, smoked paprika, garlic powder, onion powder, salt, and pepper. Mix everything together until well combined. The cream cheese and sour cream should make the filling nice and creamy while the spices add a ton of flavor.
Pro Tip: If you want to add a little heat to your taquitos, this is the time to throw in some chopped jalapeño or a sprinkle of red pepper flakes.
Step 3: Warm the Tortillas
To prevent the corn tortillas from cracking when you roll them, you’ll want to warm them up. Place them in a microwave between two damp paper towels and heat for about 20-30 seconds until they’re pliable. Alternatively, you can lightly toast them in a dry skillet over medium heat for a few seconds on each side.
Pro Tip: Don’t skip this step! Warming the tortillas makes them much easier to work with and helps them stay intact during rolling.
Step 4: Fill and Roll the Taquitos
Now for the fun part! Take one warm tortilla and place about 2-3 tablespoons of the chicken mixture in a line down the center. Roll the tortilla up tightly, starting from one edge and rolling toward the other, creating a snug taquito. Place it seam-side down on your prepared baking sheet.
Repeat this process with the remaining tortillas and filling.
Pro Tip: Make sure the seam side of the taquito is down on the baking sheet so they hold together while baking.
Step 5: Brush with Olive Oil
Once all the taquitos are rolled and lined up on the baking sheet, lightly brush the tops with olive oil or spray them with cooking spray. This helps them get extra crispy in the oven.
Step 6: Bake the Taquitos
Bake the taquitos for 20-25 minutes, or until they’re golden brown and crispy. Keep an eye on them toward the end of the cooking time to make sure they don’t over-brown.
If you prefer a crispier finish, you can broil them for the last 2-3 minutes of cooking, but watch them carefully as they can burn quickly under the broiler.
Step 7: Serve and Enjoy!
Once they’re done, take them out of the oven and let them cool for a couple of minutes before serving. Garnish with fresh cilantro and serve them with your favorite dipping sauces—guacamole, salsa, and sour cream are all excellent options!
- Prep Time: 15 minutes
- Cook Time: 24 minutes
Nutrition
- Serving Size: 12
- Calories: 200
- Carbohydrates: 12g
- Protein: 15g
Conclusion
There you have it—crispy, flavorful, gluten-free chicken taquitos that are easy to make and perfect for any occasion! Whether you’re serving them as a snack, appetizer, or main course, these taquitos are sure to become a family favorite. The best part is, you can freeze them for later, so you always have a quick and delicious meal ready to go.
Give this recipe a try, and don’t be afraid to customize it to your liking. Whether you add some heat with jalapeños or mix in some extra cheese, these taquitos are endlessly adaptable. Serve them with your favorite dips, sit back, and enjoy every crispy, cheesy bite!

