INTRODUCTION
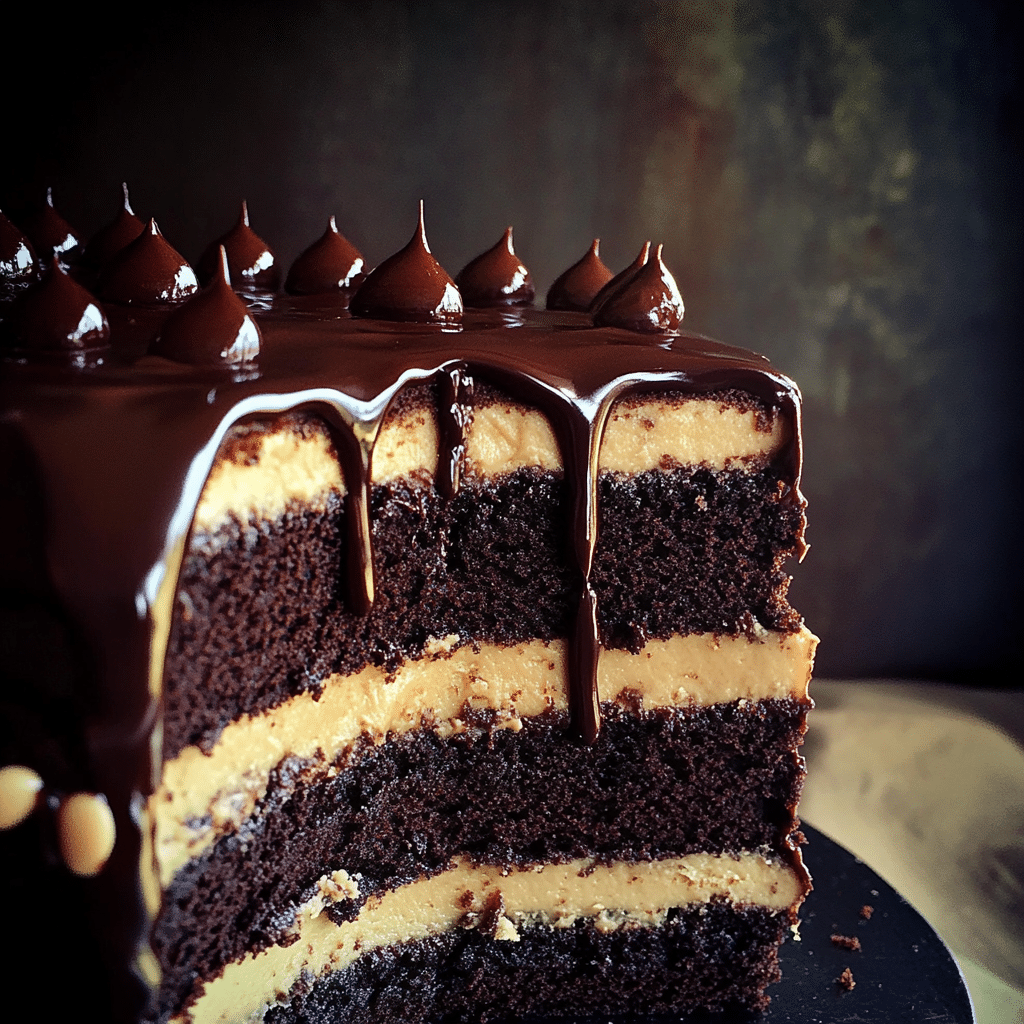
There’s nothing quite like the rich, velvety experience of a perfectly baked chocolate fudge cake. Imagine cutting into a slice and revealing that luscious, gooey interior that promises a burst of chocolatey goodness with every bite. Whether it’s a birthday, a special celebration, or simply a Tuesday that needs a little extra sweetness, this cake is your go-to dessert.
I remember the first time I attempted this chocolate fudge cake. I had a craving that wouldn’t quit, and I thought, “Why not whip up something from scratch?” Let me tell you, the smell of chocolate wafting through my kitchen was enough to make anyone swoon. Friends and family gathered around, and the joy of sharing this cake made the experience even sweeter. Now, it has become a family tradition. I often bake this cake for birthdays, holidays, or any time someone needs a little pick-me-up. Trust me, once you make this cake, it will become a staple in your home, too!
So, let’s dive into this mouthwatering recipe that’s as simple as it is delicious. Don’t worry if you’re new to baking; I’ll walk you through every step to ensure you create a cake that will impress everyone.
Why You’ll Love This Recipe
Rich and Decadent
This chocolate fudge cake is intensely chocolatey, thanks to both cocoa powder and melted chocolate. It’s rich enough to satisfy even the most dedicated chocoholics.
Easy to Make
With simple ingredients and straightforward steps, you don’t need to be a baking expert to nail this recipe. It’s perfect for beginners!
Perfect for Any Occasion
Whether it’s a fancy dinner party or a casual family gathering, this cake is a crowd-pleaser that suits any occasion. Plus, it pairs beautifully with a scoop of vanilla ice cream or a dollop of whipped cream.
Customizable
Want to switch things up? You can easily customize this cake by adding nuts, chocolate chips, or even a layer of fruit preserves for an extra flavor boost.
Preparation Time and Servings
- Total Time: 1 hour 15 minutes (includes baking and cooling time)
- Servings: 10-12 slices
- Nutrition Facts:
- Calories per serving: 450
- Protein: 6g
- Carbohydrates: 55g
- Fat: 25g
Ingredients
Cake:
- 1 ¾ cups (220g) all-purpose flour: This forms the base of your cake, giving it structure.
- 2 cups (400g) granulated sugar: Sweetness is key! This will create a delightful balance with the cocoa.
- ¾ cup (65g) unsweetened cocoa powder: For that deep, chocolate flavor.
- 1 ½ teaspoons baking powder: This helps your cake rise.
- 1 ½ teaspoons baking soda: Another leavening agent that makes the cake light and fluffy.
- 1 teaspoon salt: Enhances the flavors.
- 2 large eggs: Adds moisture and richness.
- 1 cup (240ml) whole milk: Keeps the cake tender.
- ½ cup (120ml) vegetable oil: For a moist texture.
- 2 teaspoons vanilla extract: Adds a wonderful aroma and flavor.
- 1 cup (240ml) boiling water: This might seem odd, but it makes the cake incredibly moist!
Fudge Frosting:
- 1 cup (225g) unsalted butter, softened: The creamy base for your frosting.
- 3 ½ cups (440g) powdered sugar: Sweetness and fluffiness.
- ½ cup (45g) unsweetened cocoa powder: To keep the fudge theme going.
- ½ cup (120ml) whole milk: Helps achieve the right consistency.
- 2 teaspoons vanilla extract: Because you can never have too much vanilla!
Step-by-Step Instructions
1ST sTEP: Preheat Your Oven
First things first! Preheat your oven to 350°F (175°C). This ensures your cake bakes evenly from the start.
2ND STEP: Prepare Your Pans
Grease and flour two 9-inch round cake pans. This will help your cake come out easily once it’s baked. If you have parchment paper, you can line the bottoms of the pans for extra insurance against sticking.
3RD STEP: Combine Dry Ingredients
In a large mixing bowl, whisk together the flour, granulated sugar, cocoa powder, baking powder, baking soda, and salt. Make sure there are no lumps; this will help your cake rise beautifully.
4TH STEP: Add Wet Ingredients
Add the eggs, milk, vegetable oil, and vanilla extract to the dry ingredients. Use an electric mixer on medium speed to combine everything for about 2 minutes until smooth.
5TH STEP: Add Boiling Water
Carefully stir in the boiling water. Yes, it will look a bit runny, but that’s exactly what you want! This step helps to make the cake incredibly moist.
6TH STEP: Pour into Pans
Evenly distribute the batter between the two prepared cake pans. You can use a kitchen scale if you want to be precise—each pan should hold about 1,000g of batter.
7TH STEP: Bake
Bake in the preheated oven for 30-35 minutes, or until a toothpick inserted in the center comes out clean. Your kitchen will smell divine during this time!
8TH STEP: Cool the Cakes
Once baked, remove the pans from the oven and let them cool in the pans for about 10 minutes. Then, transfer the cakes to wire racks to cool completely.
9TH STEP: Make the Frosting
While the cakes are cooling, let’s make that luscious fudge frosting! In a large bowl, beat the softened butter until creamy. Gradually add the powdered sugar and cocoa powder, alternating with the milk. Beat until smooth and fluffy. Finally, stir in the vanilla extract.
10TH STEP: Frost the Cake
Once the cakes are completely cool, place one layer on a serving plate. Spread a generous amount of frosting on top. Add the second layer and frost the top and sides of the cake. Don’t worry about perfection—rustic is beautiful!
11TH STEP: Decorate (Optional)
If you want to get fancy, you can add chocolate shavings, sprinkles, or fresh berries on top for an extra touch. This cake is stunning just as it is, but a little decoration never hurts!
How to Serve
- Slice and Enjoy: Serve slices of this decadent cake at room temperature or slightly chilled.
- Pair with Ice Cream: A scoop of vanilla or mint chocolate chip ice cream makes a delightful addition.
- Coffee or Tea: Enjoy with a cup of coffee or tea for a cozy treat.
Additional Tips for Success
- Measure Ingredients Accurately: Baking is a science, so be sure to use precise measurements for the best results.
- Room Temperature Ingredients: Ensure your eggs and milk are at room temperature before mixing. This helps with even mixing and better texture.
- Cool Completely: Make sure the cakes are fully cooled before frosting. This prevents the frosting from melting.
- Storage: If you have leftovers (which is unlikely!), store the cake in an airtight container at room temperature for up to 3 days.
- Chill the Frosting: If your frosting is too soft, chill it for about 15 minutes before using it. This will help it firm up and hold its shape better.
Recipe Variations
- Add Some Crunch: Mix in 1 cup of chopped walnuts or pecans to the batter for a delightful crunch.
- Chocolate Chips: Stir in 1 cup of semi-sweet chocolate chips to the batter for even more chocolatey goodness.
- Mint Chocolate Fudge Cake: Add a few drops of mint extract to the frosting for a refreshing twist. Garnish with fresh mint leaves for presentation.
- Gluten-Free Option: Substitute the all-purpose flour with a 1:1 gluten-free flour blend.
Serving Suggestions
- Side Dishes: Pair with a fresh fruit salad or a light whipped cream to balance the richness of the cake.
- Beverage Pairings: A rich coffee, espresso, or even a glass of milk complements the cake perfectly.
- Kid-Friendly Option: Serve slices with colorful sprinkles or ice cream to make it extra special for kids.
Freezing and Storage
Storage
- Store any leftover cake in an airtight container at room temperature for up to 3 days. If you want to keep it longer, consider freezing it.
Freezing
- Whole Cake: Wrap the cooled cake tightly in plastic wrap and then in aluminum foil. Freeze for up to 3 months.
- Frosted Slices: If you’ve already frosted the cake, freeze the individual slices on a baking sheet until solid, then wrap them tightly and store in the freezer for up to 3 months.
Reheating
- To thaw, simply place the frozen cake in the refrigerator overnight. For a slice, you can microwave it for about 15-20 seconds to warm it up without drying it out.
Special Equipment
- Mixing Bowls: Use a variety of sizes to make your baking process easier.
- Electric Mixer: A stand or hand mixer will make combining ingredients quick and easy.
- Wire Racks: Essential for cooling your cakes evenly.
- Cake Pans: Two 9-inch round pans are ideal for this recipe.
FAQ
1. Can I use cake flour instead of all-purpose flour?
Yes, you can use cake flour for a lighter texture, but you may need to adjust the liquid slightly since cake flour absorbs more moisture.
2. What can I use if I don’t have cocoa powder?
If you’re out of cocoa powder, you can use Dutch-processed cocoa powder as a substitute, though it may alter the taste slightly. You can also consider using unsweetened chocolate by melting it down, but you’ll need to adjust the sugar content accordingly.
3. Can I make this cake in advance?
Absolutely! You can bake the cakes a day or two ahead of time and store them wrapped in plastic wrap at room temperature. Frost the cake just before serving for the best results.
4. How do I know when the cake is done?
The cake is done when a toothpick inserted into the center comes out clean or with a few moist crumbs. If it comes out wet with batter, it needs more time.
5. What can I substitute for vegetable oil?
You can substitute vegetable oil with canola oil or melted coconut oil. Both work well without altering the flavor significantly.
Print
Chocolate Fudge Cake
- Total Time: 1 hour
Ingredients
For the Cake:
- 1 ¾ cups (220g) all-purpose flour: This forms the base of your cake, giving it structure.
- 2 cups (400g) granulated sugar: Sweetness is key! This will create a delightful balance with the cocoa.
- ¾ cup (65g) unsweetened cocoa powder: For that deep, chocolate flavor.
- 1 ½ teaspoons baking powder: This helps your cake rise.
- 1 ½ teaspoons baking soda: Another leavening agent that makes the cake light and fluffy.
- 1 teaspoon salt: Enhances the flavors.
- 2 large eggs: Adds moisture and richness.
- 1 cup (240ml) whole milk: Keeps the cake tender.
- ½ cup (120ml) vegetable oil: For a moist texture.
- 2 teaspoons vanilla extract: Adds a wonderful aroma and flavor.
- 1 cup (240ml) boiling water: This might seem odd, but it makes the cake incredibly moist!
For the Fudge Frosting:
- 1 cup (225g) unsalted butter, softened: The creamy base for your frosting.
- 3 ½ cups (440g) powdered sugar: Sweetness and fluffiness.
- ½ cup (45g) unsweetened cocoa powder: To keep the fudge theme going.
- ½ cup (120ml) whole milk: Helps achieve the right consistency.
- 2 teaspoons vanilla extract: Because you can never have too much vanilla!
Instructions
1. Preheat Your Oven
First things first! Preheat your oven to 350°F (175°C). This ensures your cake bakes evenly from the start.
2. Prepare Your Pans
Grease and flour two 9-inch round cake pans. This will help your cake come out easily once it’s baked. If you have parchment paper, you can line the bottoms of the pans for extra insurance against sticking.
3. Combine Dry Ingredients
In a large mixing bowl, whisk together the flour, granulated sugar, cocoa powder, baking powder, baking soda, and salt. Make sure there are no lumps; this will help your cake rise beautifully.
4. Add Wet Ingredients
Add the eggs, milk, vegetable oil, and vanilla extract to the dry ingredients. Use an electric mixer on medium speed to combine everything for about 2 minutes until smooth.
5. Add Boiling Water
Carefully stir in the boiling water. Yes, it will look a bit runny, but that’s exactly what you want! This step helps to make the cake incredibly moist.
6. Pour into Pans
Evenly distribute the batter between the two prepared cake pans. You can use a kitchen scale if you want to be precise—each pan should hold about 1,000g of batter.
7. Bake
Bake in the preheated oven for 30-35 minutes, or until a toothpick inserted in the center comes out clean. Your kitchen will smell divine during this time!
8. Cool the Cakes
Once baked, remove the pans from the oven and let them cool in the pans for about 10 minutes. Then, transfer the cakes to wire racks to cool completely.
9. Make the Frosting
While the cakes are cooling, let’s make that luscious fudge frosting! In a large bowl, beat the softened butter until creamy. Gradually add the powdered sugar and cocoa powder, alternating with the milk. Beat until smooth and fluffy. Finally, stir in the vanilla extract.
10. Frost the Cake
Once the cakes are completely cool, place one layer on a serving plate. Spread a generous amount of frosting on top. Add the second layer and frost the top and sides of the cake. Don’t worry about perfection—rustic is beautiful!
11. Decorate (Optional)
If you want to get fancy, you can add chocolate shavings, sprinkles, or fresh berries on top for an extra touch. This cake is stunning just as it is, but a little decoration never hurts!
Nutrition
- Serving Size: 10
- Calories: 450
- Fat: 25g
- Carbohydrates: 55g
- Protein: 6g
Conclusion
There you have it—the ultimate chocolate fudge cake recipe that is bound to become a favorite in your home. It’s rich, decadent, and incredibly satisfying, making it perfect for any occasion. The joy of baking this cake and the smiles it brings to your loved ones’ faces are truly the best part.
So, what are you waiting for? Gather your ingredients, preheat your oven, and let’s make some magic happen in the kitchen! I promise you won’t regret it. Your family and friends will be raving about this cake long after the last slice is gone. Happy baking!

