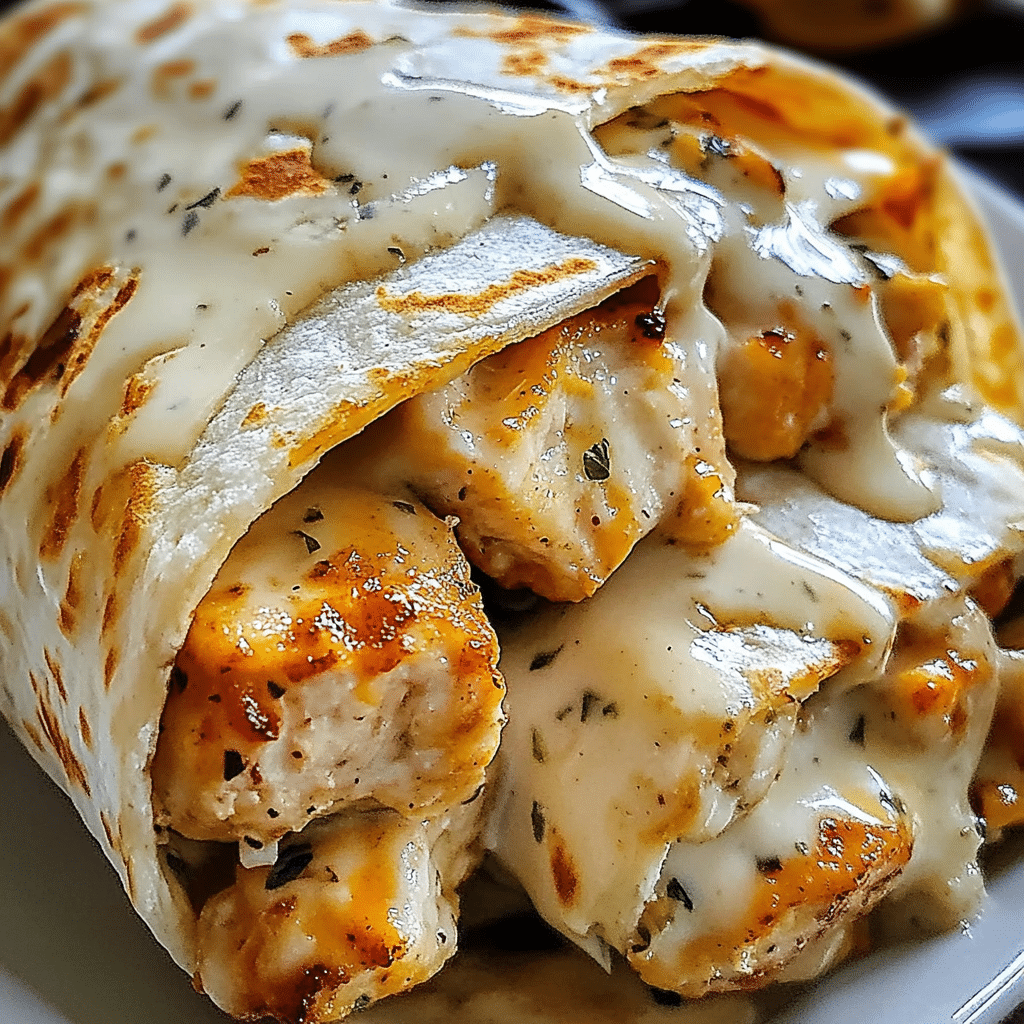
There’s something about a warm, cheesy wrap that just feels like the ultimate comfort food, especially on those days when you want something quick, but oh-so-satisfying. Enter Cheesy Garlic Chicken Wraps! These wraps are packed with tender chicken, melted cheese, and a garlicky kick that will have you coming back for more. Whether it’s for a casual lunch, a quick weeknight dinner, or a game-day snack, these wraps are a winner. Plus, they’re super customizable—you can add your favorite veggies, switch up the cheese, or even spice things up with a little jalapeño!
I first discovered this recipe when I was trying to make something quick for dinner after a long day, and it’s been a staple in my house ever since. The combination of gooey cheese and garlic with the juicy chicken wrapped in a soft tortilla is pure magic. I love serving these wraps when friends come over, especially because they can pick and choose their own fillings to suit their tastes. Trust me, you’re going to love it!
Why You’ll Love This Recipe
Quick and Easy: With just a few ingredients and minimal prep time, this recipe is perfect for busy days. You can have these cheesy, garlicky wraps ready in about 20 minutes from start to finish!
Family-Friendly: Kids and adults alike will love the cheesy, garlicky flavor—plus, it’s easy to sneak in some veggies like sautéed bell peppers, spinach, or even avocado slices without anyone noticing!
Customizable: You can easily swap out the chicken for another protein (think turkey, beef, or even tofu), change up the cheese to suit your taste, or add your favorite toppings. These wraps are endlessly versatile.
Melt-in-Your-Mouth Flavor: The combination of garlic, melted cheese, and juicy chicken is irresistible. The tortillas get perfectly crispy on the outside while staying soft and cheesy on the inside. It’s like a quesadilla and burrito had the most delicious baby!
Great for Leftovers: Have some leftover rotisserie chicken? This recipe is perfect for using up whatever you have on hand, so nothing goes to waste.
Prep Time and Servings
Total Time: 20 minutes (10 minutes prep, 10 minutes cooking)
Servings: 4 wraps
Calories per serving: 450, Protein: 30g, Carbs: 35g, Fat: 18g
Ingredients
- 2 cups cooked chicken, shredded or diced (leftover rotisserie chicken works great)
- 1 cup shredded mozzarella or cheddar cheese (or a mix of both for extra cheesy goodness!)
- 2 cloves garlic, minced
- 1/4 cup sour cream or plain Greek yogurt (for creaminess and a little tang)
- 4 large tortillas
- 1 tablespoon olive oil
- 1/4 teaspoon salt
- 1/4 teaspoon black pepper
- Fresh parsley for garnish (optional)
- Optional Add-ins:
- 1/2 cup sautéed bell peppers for extra flavor and nutrition
- 1/2 avocado, sliced for creaminess
- 1/4 cup pickled jalapeños for a spicy kick
- 2 tablespoons salsa or hot sauce to drizzle over the chicken mixture
Step-by-Step Instructions
- Prepare the Chicken Filling: In a medium bowl, combine the cooked chicken, shredded cheese, minced garlic, sour cream, salt, and pepper. Stir everything together until it’s well combined, and the cheese is evenly distributed throughout the chicken. This mixture will be the heart of your wrap, so don’t skimp on that garlic! If you love garlic as much as I do, feel free to add an extra clove. For a spicier twist, toss in a pinch of red pepper flakes or some diced jalapeños at this stage.
- Heat the Tortillas: To make sure the tortillas are nice and soft, warm them in a dry skillet over medium heat for about 20-30 seconds on each side. This helps make them more pliable, which will make wrapping them a lot easier. Warm tortillas also ensure that the cheese melts beautifully once the wraps are assembled.
- Assemble the Wraps: Lay one tortilla flat on a clean surface and spoon about 1/4 of the chicken mixture into the center. Spread it out a bit, leaving some space around the edges. Fold the sides of the tortilla over the filling, then roll it up tightly from one end to the other, just like you would with a burrito. Make sure to tuck the sides in as you roll to keep all that cheesy goodness inside. Repeat with the remaining tortillas and filling.
- Cook the Wraps: In the same skillet you used to warm the tortillas, heat the olive oil over medium heat. Place the wraps in the skillet, seam side down, and cook for about 2-3 minutes on each side, or until the outside is golden brown and crispy, and the cheese is melted. Keep an eye on them so they don’t burn! If you want that extra crunch, you can also brush the wraps with a bit of melted butter before cooking.
- Serve and Enjoy: Once the wraps are golden and crispy, remove them from the skillet and let them cool for a minute before slicing them in half. Garnish with fresh parsley if you like, and serve immediately! These wraps are delicious on their own, but you can take them to the next level by serving them with your favorite dipping sauces or sides.
How to Serve
- Serve with a Dipping Sauce: Try dipping these wraps in sour cream, salsa, guacamole, or even a garlic aioli for an extra flavor boost.
- Pair with a Side Salad: A fresh green salad with a light vinaigrette balances out the richness of the wraps and makes for a more complete meal.
- Serve with Veggies: Roasted veggies like broccoli or zucchini, or a simple side of corn on the cob, work great with these wraps.
Additional Tips for Success
Use Rotisserie Chicken: Save time by using store-bought rotisserie chicken. It’s a lifesaver when you need dinner on the table fast! Just shred the chicken and mix it with the other filling ingredients.
Crispy Tortilla Tip: For extra crispy wraps, brush the outside with a little melted butter or oil before placing them in the skillet. You can also broil the wraps in the oven for 1-2 minutes after pan-frying them for an even crunchier exterior.
Don’t Overfill: It can be tempting to stuff your wraps with as much filling as possible, but this can make them difficult to roll and cook evenly. Stick to about 1/4 of the mixture per wrap for best results.
Adjust the Spice Level: If you like your food on the spicier side, feel free to add more garlic, some cayenne pepper, or a drizzle of your favorite hot sauce to the chicken mixture. For a milder version, stick with just the cheese and garlic, and maybe a pinch of black pepper.
Sauté Your Veggies: If you’re adding vegetables like bell peppers or onions, sauté them for a few minutes before adding them to the wraps. This helps soften the veggies and brings out their natural sweetness.
Recipe Variations
Vegetarian Option: Swap the chicken for black beans, sautéed mushrooms, or roasted veggies for a delicious vegetarian version. You can also add crumbled tofu or tempeh for an extra protein boost.
Gluten-Free: Use gluten-free tortillas to make this recipe gluten-free. Just make sure to check that all your other ingredients, like sour cream and cheese, are also gluten-free.
Spicy Cheesy Chicken Wraps: Add a kick to your wraps by mixing in some diced jalapeños, a dash of cayenne pepper, or a splash of hot sauce into the chicken mixture.
Different Cheeses: Try using a mix of cheeses like Monterey Jack, Pepper Jack, or even a smoky gouda for a different flavor. If you want a creamier wrap, try adding a little cream cheese to the filling!
Herb Variations: Swap out the parsley for cilantro, thyme, or basil to give your wraps a different flavor profile.
Serving Suggestions
- With a Salad: A simple green salad with a light vinaigrette pairs perfectly with the richness of the wraps.
- Roasted Veggies: Try serving the wraps alongside some roasted broccoli, carrots, or zucchini.
- Dipping Sauces: Serve with guacamole, sour cream, or a garlic aioli for dipping.
- With Rice or Quinoa: For a heartier meal, serve the wraps alongside a side of rice or quinoa to make it even more filling.
Freezing and Storage
Storage: Store leftover wraps in an airtight container in the fridge for up to 3 days. To reheat, simply pop them back in a skillet over medium heat until warmed through. You can also microwave them for about 1 minute, but they won’t be as crispy.
Freezing: These wraps freeze beautifully! To freeze, wrap each one tightly in plastic wrap or foil and store in a freezer-safe container for up to 2 months. To reheat, let the wraps thaw in the fridge overnight, then cook them in a skillet until crispy and heated through. Alternatively, you can bake the frozen wraps at 350°F for about 15-20 minutes.
Special Equipment
- Non-Stick Skillet: A good non-stick skillet is essential for getting that perfectly crispy wrap without sticking.
- Sharp Knife: You’ll want a sharp knife to easily slice through the crispy tortilla without squashing the filling.
- Tongs: These are handy for flipping the wraps in the skillet without burning your fingers!
FAQ
Can I use pre-cooked chicken?
Yes! Rotisserie chicken, grilled chicken breast, or even leftover chicken from another meal will work perfectly.
Can I bake these wraps instead of pan-frying?
Absolutely. If you prefer a hands-off approach, place the wraps on a baking sheet and bake at 400°F for 10-12 minutes, or until crispy and heated through.
Can I add other fillings?
Of course! This recipe is super versatile. You can add sautéed veggies, cooked rice, or even beans to bulk them up.
What if I don’t have mozzarella?
No problem! Cheddar, Monterey Jack, or even a Mexican blend would be delicious in these wraps.
Can I make these dairy-free?
Sure! Just swap the cheese for your favorite dairy-free cheese and use a dairy-free yogurt or mayo in place of the sour cream.
Can I freeze these wraps?
Yes! Wrap each one tightly in plastic wrap or foil and store them in a freezer-safe container for up to 2 months. Thaw overnight in the fridge, then reheat in a skillet or bake in the oven until crispy.
Can I use corn tortillas instead of flour tortillas?
You can, but keep in mind that corn tortillas are smaller and can be more delicate. You may want to double them up to avoid tearing.
Can I make these wraps ahead of time?
Yes! You can assemble the wraps up to 24 hours in advance and store them in the fridge. When you’re ready to eat, just cook them in the skillet as directed.
How do I keep the wraps from getting soggy?
If you’re worried about soggy wraps, be sure not to overfill them with too much sour cream or wet ingredients. You can also pat your chicken dry before adding it to the mix.
What sides go well with these wraps?
These wraps pair well with a variety of sides, including a simple salad, roasted vegetables, or rice and beans.
Conclusion
I can’t wait to see how your Cheesy Garlic Chicken Wraps turn out! Whether you’re enjoying them for lunch, dinner, or a snack, they’re sure to hit the spot. With their crispy exterior, gooey cheese, and tender chicken filling, they’re a comforting meal that comes together in a flash. Don’t forget to snap a photo and tag me on social media—I love seeing your delicious creations! Happy cooking!
Print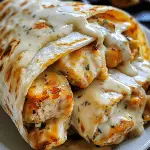
Cheesy Garlic Chicken Wraps
- Total Time: 20 minutes
Description
I first made these Cheesy Garlic Chicken Wraps when I was craving something comforting but didn’t want to spend too much time in the kitchen. The combination of tender chicken, gooey cheese, and the rich, garlicky flavor wrapped in a tortilla makes this recipe an instant hit with my family. Whether you’re serving them for lunch, dinner, or even a snack, these wraps are sure to become a favorite in your home.
Ingredients
- 2 large tortillas (flour or whole wheat)
- 1 large chicken breast (cooked and shredded)
- 1 cup shredded mozzarella cheese
- ½ cup shredded cheddar cheese
- 2 tablespoons butter
- 2 cloves garlic (minced)
- ½ teaspoon garlic powder
- ¼ teaspoon paprika
- Salt and pepper to taste
- Fresh parsley (chopped, for garnish)
Instructions
- Cook the Garlic Butter:
In a small pan, melt the butter over medium heat. Add the minced garlic and cook until fragrant, about 1-2 minutes. Stir in the garlic powder and paprika. Remove from heat and set aside. - Prepare the Wraps:
Lay the tortillas flat and sprinkle a layer of mozzarella and cheddar cheese on each one. Add the cooked, shredded chicken evenly on top of the cheese layer. Drizzle the garlic butter sauce over the chicken. - Fold the Wraps:
Fold the sides of the tortilla inward, then roll the wraps tightly. Secure with toothpicks if necessary to keep them in place. - Cook the Wraps:
Heat a skillet over medium heat. Place the wraps seam-side down in the skillet and cook for about 3-4 minutes per side, or until the tortillas are golden brown and crispy, and the cheese is melted inside. - Serve:
Remove the wraps from the skillet, cut in half, and garnish with freshly chopped parsley. Serve while warm and enjoy!
- Prep Time: 10 minutes
- Cook Time: 10 minutes
Nutrition
- Serving Size: 2
- Calories: 450

