Introduction
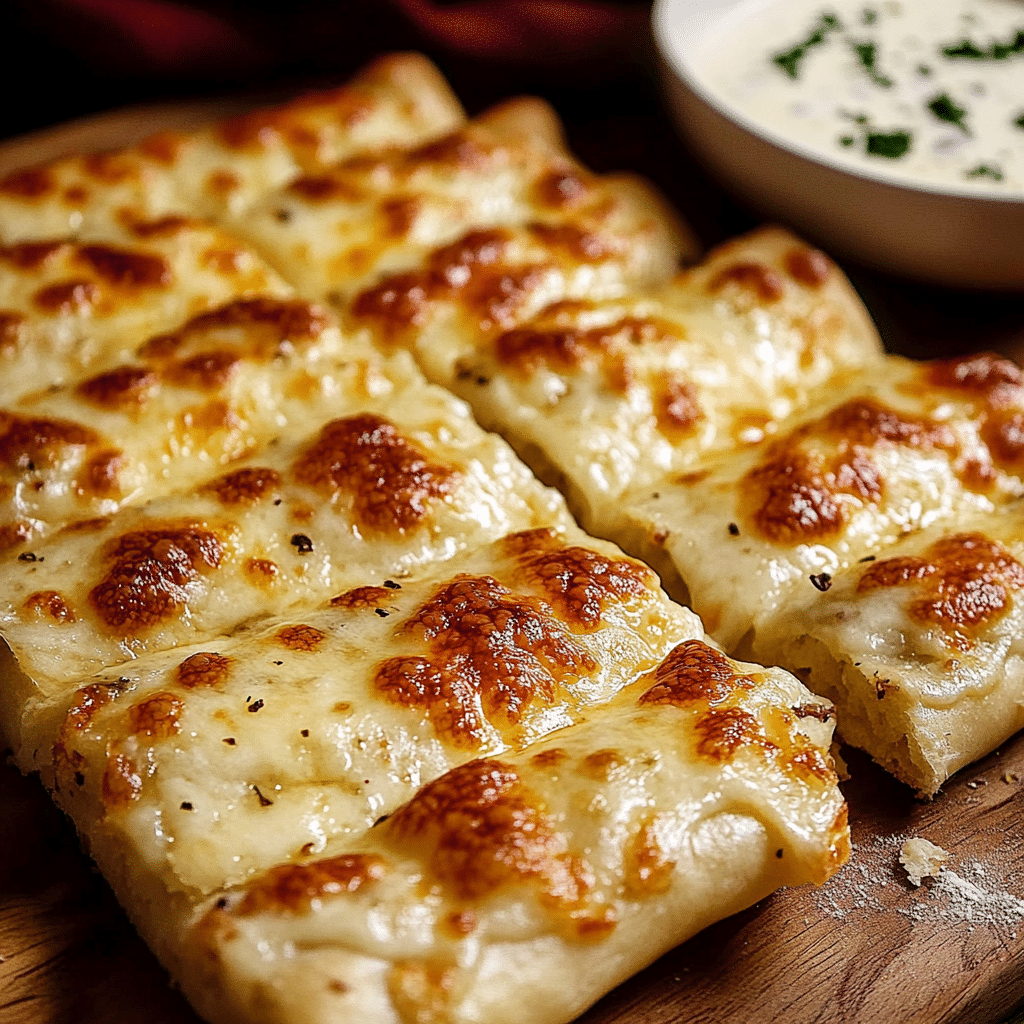
There’s something undeniably comforting about the aroma of fresh bread baking in the oven. But when you add ooey-gooey cheese to the mix, you’ve got a treat that’s hard to resist. Cheese breadsticks are like a warm hug, and they’re perfect for any occasion—whether it’s a cozy night in, a game day gathering, or a casual dinner with friends.
These breadsticks are super simple to make and are a hit with everyone. The combination of soft, chewy bread infused with melted cheese and a sprinkle of garlic and herbs takes them to the next level. They’re perfect for dipping in marinara sauce or your favorite ranch dressing, making them an irresistible appetizer or snack.
I first stumbled upon this recipe during a pizza night with my family. We had some dough left over, and I decided to get a little creative. After a bit of experimenting, I found the perfect blend of flavors, and it quickly became a family favorite. My kids love helping roll out the dough and sprinkling on the cheese—it’s a fun way to get everyone involved in the kitchen!
So, whether you’re looking to impress guests or simply treat yourself to a delicious snack, these cheese breadsticks are sure to become a staple in your home. Let’s get started!
Why You’ll Love This Recipe
Here are a few reasons why these cheese breadsticks are a must-try:
- Easy to Make: With just a few simple ingredients, you’ll have fresh cheese breadsticks in no time! Even if you’re new to baking, this recipe is beginner-friendly.
- Family-Friendly: These breadsticks are a hit with kids and adults alike. Serve them as an appetizer, snack, or alongside your favorite pasta dishes.
- Rich in Flavor: The melty cheese combined with the buttery garlic topping creates a flavor explosion that will have everyone coming back for seconds (and thirds!).
- Customizable: You can easily adjust the recipe to suit your taste. Add different cheeses, herbs, or spices to create your own twist on these delightful sticks.
Imagine pulling a tray of golden, cheesy breadsticks from the oven, the aroma wafting through your home. Each bite is a delicious blend of cheesy goodness, with a hint of garlic and the perfect chewy texture. Trust me; you’ll want to make these again and again!
Preparation Time and Servings
- Total Time: 30 minutes (10 minutes prep time, 20 minutes baking)
- Servings: 12 breadsticks
- Nutrition Facts:
- Calories per serving: 150
- Protein: 6g
- Carbohydrates: 18g
Ingredients
To make these delicious cheese breadsticks, you’ll need the following ingredients:
- 2 cups all-purpose flour: This forms the base of your breadsticks and gives them a nice chewy texture.
- 1 packet (2 ¼ teaspoons) active dry yeast: This helps the breadsticks rise and become fluffy.
- ¾ cup warm water (about 110°F): Activate the yeast and help the dough rise.
- 1 tablespoon sugar: Adds a touch of sweetness and helps activate the yeast.
- 1 teaspoon salt: Enhances the flavor of the breadsticks.
- 1 cup shredded mozzarella cheese: The star of the show! Provides that gooey, melty goodness.
- 2 tablespoons butter, melted: Adds richness and helps the breadsticks brown.
- 1 teaspoon garlic powder: For that delicious garlic flavor.
- 1 teaspoon Italian seasoning: A mix of herbs that adds depth to the flavor.
- Optional toppings: Extra cheese, fresh herbs, or crushed red pepper for added flavor.
Step-by-Step Instructions
Here’s how to make your very own Cheese Breadsticks from scratch:
1st step: Prepare the Dough
- In a small bowl, combine warm water, sugar, and yeast. Stir gently and let it sit for about 5-10 minutes until it becomes frothy. This means your yeast is activated and ready to go!
- In a large mixing bowl, combine flour and salt. Once the yeast mixture is ready, pour it into the flour mixture. Stir until a dough begins to form.
2nd step: Knead the Dough
- Transfer the dough onto a lightly floured surface. Knead the dough for about 5 minutes until it becomes smooth and elastic. Don’t worry if it’s a bit sticky at first; just add a little more flour as needed.
3rd step: Let the Dough Rise
- Place the kneaded dough in a lightly greased bowl, cover it with a clean kitchen towel, and let it rise in a warm place for about 15 minutes. It should double in size during this time.
4th step: Preheat the Oven
- While the dough is rising, preheat your oven to 425°F (220°C). Line a baking sheet with parchment paper for easy cleanup.
5th step: Shape the Breadsticks
- Once the dough has risen, punch it down to release the air. Divide it into 12 equal pieces. Roll each piece into a long, thin stick (about 8 inches long). Place them on the prepared baking sheet, leaving some space between each one.
6th step: Add the Cheese
- Sprinkle shredded mozzarella cheese generously over the top of each breadstick. Feel free to add more if you love cheese!
7th step: Prepare the Topping
- In a small bowl, mix melted butter, garlic powder, and Italian seasoning. Brush this mixture over the breadsticks, ensuring they are well coated. This will give them a beautiful golden color and a burst of flavor.
8th step: Bake the Breadsticks
- Place the baking sheet in the preheated oven and bake for about 15-20 minutes, or until the breadsticks are golden brown and the cheese is bubbly. Keep an eye on them to avoid burning!
9th Step: Cool and Serve
- Once they’re done, remove them from the oven and let them cool for a few minutes. You can sprinkle extra cheese or fresh herbs on top if desired. Serve them warm with marinara sauce, ranch dressing, or your favorite dip!
How to Serve
These cheese breadsticks are incredibly versatile and can be served in various ways:
- Dipping Sauces: Serve them with marinara sauce, ranch dressing, or garlic butter for a delicious dip. The gooey cheese pairs perfectly with these sauces!
- With Pasta: They make an excellent side dish to your favorite pasta meal. Pair them with spaghetti and meatballs or a creamy alfredo.
- Snack Time: Perfect for game days or movie nights! Set out a platter of these cheesy delights for friends and family to enjoy while they watch the game or a favorite film.
Additional Tips
To ensure your cheese breadsticks turn out perfectly, here are five helpful tips:
- Don’t Rush the Dough: Allowing the dough to rise is crucial for achieving that soft, chewy texture. Make sure it doubles in size before proceeding.
- Use Fresh Ingredients: Make sure your yeast is fresh! If it doesn’t bubble when mixed with warm water, it may be expired.
- Experiment with Cheeses: While mozzarella is classic, feel free to mix it up! Try cheddar, provolone, or even a spicy pepper jack for a kick.
- Garlic Butter Variation: For extra flavor, mix minced garlic into the melted butter before brushing it onto the breadsticks. It adds a delightful aromatic quality!
- Make It Your Own: Don’t hesitate to add your favorite herbs or spices! Oregano, thyme, or crushed red pepper flakes can enhance the flavor profile even more.
Recipe Variations
Here are some fun ways to customize this cheese breadsticks recipe to suit your taste:
- Herbed Cheese Breadsticks: Add fresh or dried herbs like rosemary, basil, or parsley to the dough for a fragrant twist.
- Spicy Cheese Breadsticks: Mix in some crushed red pepper flakes or chopped jalapeños for a spicy kick!
- Garlic Parmesan Breadsticks: Replace the mozzarella with grated Parmesan cheese and add extra garlic for a rich flavor.
- Stuffed Cheese Breadsticks: Roll the dough out, place cheese and your favorite fillings (like pepperoni or vegetables) inside, and seal them before baking for cheesy stuffed breadsticks.
- Sweet Cheese Breadsticks: For a dessert option, use a sweet dough and fill it with cream cheese and sugar. Drizzle with icing after baking for a sweet treat!
Serving Suggestion
Looking for ideas to complement your cheese breadsticks? Here are some side dishes and beverages that pair perfectly:
- Side Dishes: Serve these breadsticks alongside a fresh arugula salad drizzled with lemon vinaigrette, or with roasted vegetables for a well-rounded meal.
- Wine Pairings: If you enjoy wine, a light, crisp white wine like Pinot Grigio or a medium-bodied red like Chianti complements the cheesy flavors beautifully.
- Kid-Friendly Options: For a family-friendly touch, serve the breadsticks with buttered noodles or a plate of marinara sauce for dipping.
Freezing and Storage
If you have leftovers (which is rare but can happen), here’s how to store and freeze your cheese breadsticks:
- Storing: Allow the breadsticks to cool completely, then place them in an airtight container or wrap them in plastic wrap. They can be stored at room temperature for up to 2 days.
- Freezing: To freeze, wrap each breadstick individually in plastic wrap and place them in a freezer-safe bag. They can be frozen for up to 3 months. When you’re ready to enjoy, simply bake them from frozen at 400°F (200°C) for about 10-15 minutes, or until heated through.
FAQ: Cheese Breadsticks
1. Can I use store-bought dough for this recipe?
Yes! If you’re short on time or prefer convenience, feel free to use store-bought pizza or bread dough. Simply roll it out, add the cheese and toppings, and bake according to the package instructions.
2. What type of cheese works best for cheese breadsticks?
While mozzarella is the classic choice for its melty texture, you can experiment with other cheeses like cheddar, provolone, or even a spicy pepper jack. Mixing different cheeses can create a more complex flavor profile.
3. Can I make these breadsticks ahead of time?
Yes! You can prepare the dough in advance and let it rise. Once the dough is ready, you can shape the breadsticks and store them in the fridge for up to 24 hours before baking. Just be sure to let them come to room temperature before baking.
4. How can I make these breadsticks healthier?
To make a healthier version, consider using whole wheat flour instead of all-purpose flour. You can also reduce the amount of cheese or try using low-fat cheese options. Adding vegetables like spinach or bell peppers can also boost the nutritional value.
5. What dips pair well with cheese breadsticks?
These cheesy delights are perfect for dipping! Popular options include marinara sauce, ranch dressing, garlic butter, or a spicy sriracha mayo. You can even serve them with a creamy spinach dip for an extra treat!
6. How do I store leftovers?
To store leftovers, allow the breadsticks to cool completely and place them in an airtight container. They can be kept at room temperature for up to 2 days. For longer storage, wrap each breadstick in plastic wrap and freeze them for up to 3 months.
7. Can I make these cheese breadsticks gluten-free?
Absolutely! To make gluten-free cheese breadsticks, simply substitute all-purpose flour with a gluten-free flour blend. Ensure the yeast is also gluten-free, and follow the rest of the recipe as directed.
8. How can I enhance the flavor of my cheese breadsticks?
For added flavor, consider incorporating herbs and spices into the dough or the topping. Fresh herbs like rosemary, thyme, or parsley can elevate the taste. You can also sprinkle some Parmesan cheese on top for an extra layer of flavor before baking.
Print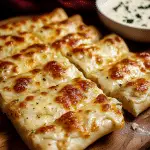
Cheese Breadsticks
- Total Time: 30 minutes
Ingredients
To make these delicious cheese breadsticks, you’ll need the following ingredients:
- 2 cups all-purpose flour: This forms the base of your breadsticks and gives them a nice chewy texture.
- 1 packet (2 ¼ teaspoons) active dry yeast: This helps the breadsticks rise and become fluffy.
- ¾ cup warm water (about 110°F): Activate the yeast and help the dough rise.
- 1 tablespoon sugar: Adds a touch of sweetness and helps activate the yeast.
- 1 teaspoon salt: Enhances the flavor of the breadsticks.
- 1 cup shredded mozzarella cheese: The star of the show! Provides that gooey, melty goodness.
- 2 tablespoons butter, melted: Adds richness and helps the breadsticks brown.
- 1 teaspoon garlic powder: For that delicious garlic flavor.
- 1 teaspoon Italian seasoning: A mix of herbs that adds depth to the flavor.
- Optional toppings: Extra cheese, fresh herbs, or crushed red pepper for added flavor.
Instructions
- Prepare the Dough:
- In a small bowl, combine warm water, sugar, and yeast. Stir gently and let it sit for about 5-10 minutes until it becomes frothy. This means your yeast is activated and ready to go!
- In a large mixing bowl, combine flour and salt. Once the yeast mixture is ready, pour it into the flour mixture. Stir until a dough begins to form.
- Knead the Dough:
- Transfer the dough onto a lightly floured surface. Knead the dough for about 5 minutes until it becomes smooth and elastic. Don’t worry if it’s a bit sticky at first; just add a little more flour as needed.
- Let the Dough Rise:
- Place the kneaded dough in a lightly greased bowl, cover it with a clean kitchen towel, and let it rise in a warm place for about 15 minutes. It should double in size during this time.
- Preheat the Oven:
- While the dough is rising, preheat your oven to 425°F (220°C). Line a baking sheet with parchment paper for easy cleanup.
- Shape the Breadsticks:
- Once the dough has risen, punch it down to release the air. Divide it into 12 equal pieces. Roll each piece into a long, thin stick (about 8 inches long). Place them on the prepared baking sheet, leaving some space between each one.
- Add the Cheese:
- Sprinkle shredded mozzarella cheese generously over the top of each breadstick. Feel free to add more if you love cheese!
- Prepare the Topping:
- In a small bowl, mix melted butter, garlic powder, and Italian seasoning. Brush this mixture over the breadsticks, ensuring they are well coated. This will give them a beautiful golden color and a burst of flavor.
- Bake the Breadsticks:
- Place the baking sheet in the preheated oven and bake for about 15-20 minutes, or until the breadsticks are golden brown and the cheese is bubbly. Keep an eye on them to avoid burning!
- Cool and Serve:
- Once they’re done, remove them from the oven and let them cool for a few minutes. You can sprinkle extra cheese or fresh herbs on top if desired. Serve them warm with marinara sauce, ranch dressing, or your favorite dip!
- Prep Time: 10 minutes
- Cook Time: 20 minutes
Nutrition
- Serving Size: 12
- Calories: 150
- Carbohydrates: 18g
- Protein: 6g
Conclusion
These cheese breadsticks are more than just a snack; they’re a warm, comforting treat that brings people together. Whether you’re enjoying them on a quiet night at home or serving them at a gathering, they’re sure to impress and delight everyone.
So grab your ingredients, roll up your sleeves, and get ready to whip up a batch of these cheesy delights. You’ll love how simple they are to make and how delicious they taste. Don’t forget to share your creations with friends and family, and feel free to experiment with flavors and toppings. Happy baking!

