Introduction
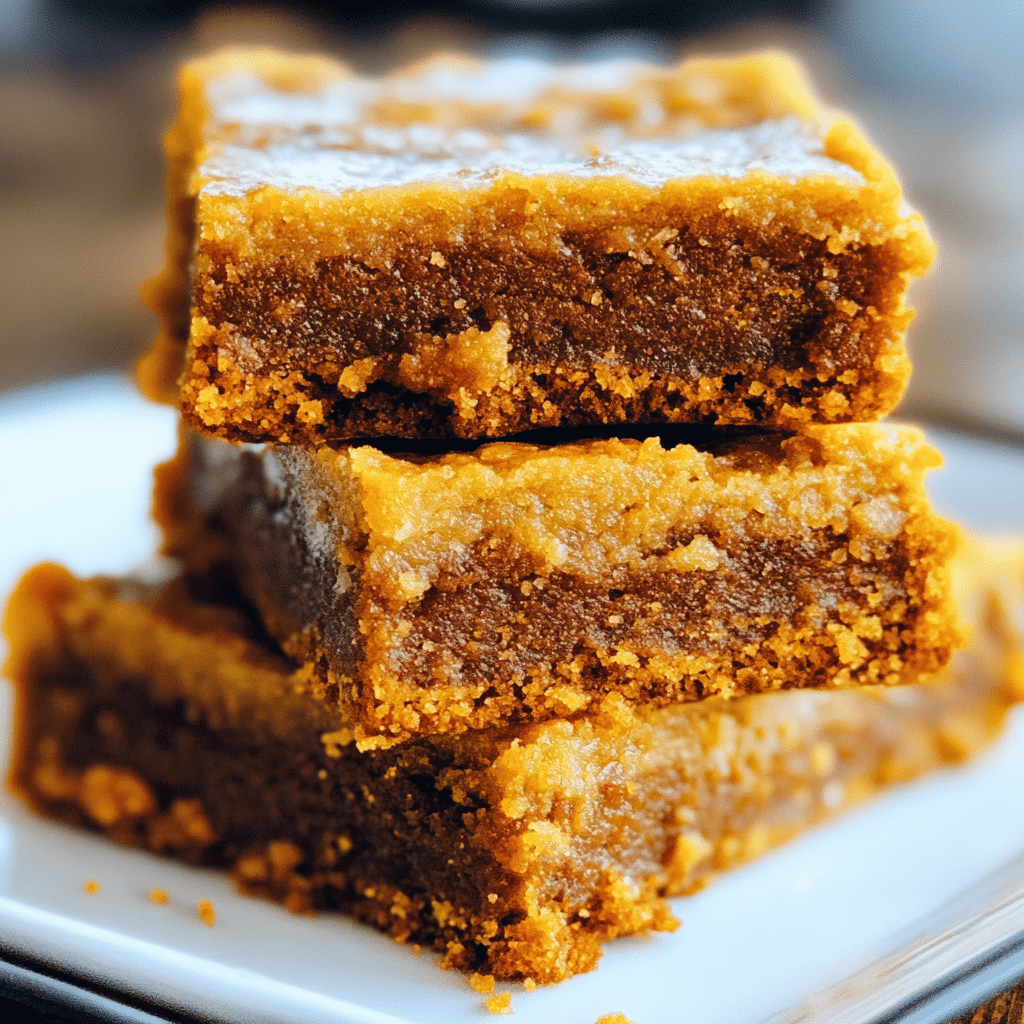
There’s something magical about Biscuit Pie that instantly makes you feel at home. Imagine biting into a slice of golden, flaky biscuit crust filled with a luscious, sweet filling that warms your heart and soul. Whether it’s a chilly evening or a sunny afternoon, this dessert is the perfect treat to brighten your day. It’s like a cozy hug on a plate!
What makes this recipe truly special is its versatility. You can fill it with anything your heart desires—from juicy berries to creamy custards—making it a fantastic option for any occasion. I remember the first time I made Biscuit Pie. I was trying to impress my family during a weekend gathering, and I couldn’t believe how simple yet impressive it turned out. The aroma wafting through the house was irresistible, and everyone was eager to dig in!
Biscuit Pie has become a family favorite over the years. It’s a dish that sparks joy and brings people together, whether we’re celebrating a birthday, hosting a casual dinner, or simply enjoying a quiet night at home. So, if you’re looking for a delightful recipe that’s easy to make and delicious to eat, you’ve come to the right place! Let’s get started on creating a Biscuit Pie that will have everyone asking for seconds (or thirds!).
Why You’ll Love This Recipe
Here’s why Biscuit Pie deserves a spot in your recipe collection:
- Easy to Make: With just a few simple ingredients and minimal prep time, this recipe is perfect for both beginner cooks and seasoned chefs.
- Family-Friendly: Kids and adults alike will fall in love with the flaky crust and sweet filling. You can even let the little ones help out!
- Customizable: The filling options are endless! Use fresh fruits, chocolate, or even a savory mixture to suit your taste.
- Perfect for Any Occasion: Whether it’s a holiday gathering, a potluck, or just a Tuesday night treat, Biscuit Pie is always a hit.
- Comforting and Delicious: The combination of a buttery biscuit crust and a delightful filling creates a dessert that feels like home.
Picture this: a warm slice of Biscuit Pie topped with a scoop of vanilla ice cream, melting slowly over the sides. It’s the kind of dessert that makes you want to savor every last bite.
Preparation Time and Servings
- Total Time: 1 hour (30 minutes prep, 30 minutes baking)
- Servings: This recipe serves about 8-10 people.
- Nutrition Facts: Calories per serving: 350, Protein: 6g, Carbs: 50g, Fat: 15g.
Ingredients
Here’s what you’ll need to make your own Biscuit Pie:
- For the Biscuit Crust:
- 2 cups all-purpose flour
- 1 tablespoon baking powder
- 1/2 teaspoon salt
- 1/4 cup granulated sugar
- 1/2 cup unsalted butter, cold and cubed
- 3/4 cup milk
- For the Filling (choose one or mix them!):
- Berry Filling: 2 cups fresh or frozen mixed berries (strawberries, blueberries, raspberries)
- Chocolate Filling: 1 cup chocolate chips
- Custard Filling: 2 cups prepared vanilla custard
- Savory Filling: 1 cup cooked chicken, shredded, mixed with 1/2 cup cream of chicken soup and 1/2 cup frozen mixed vegetables
- For Topping:
- 1 egg, beaten (for egg wash)
- Optional: powdered sugar for dusting
Each ingredient plays a crucial role in creating that delicious, comforting taste we all love. The cold butter ensures the biscuits are flaky, while the filling adds sweetness and flavor to every bite.
Step-by-Step Instructions
1st step: Preheat the Oven
Preheat your oven to 425°F (220°C). A hot oven is essential for achieving that perfectly golden biscuit crust.
2nd step: Make the Biscuit Dough
- Mix Dry Ingredients: In a large mixing bowl, combine the flour, baking powder, salt, and sugar. Stir until well combined. This is the foundation of your biscuit pie, so make sure the ingredients are evenly mixed.
- Cut in the Butter: Add the cold, cubed butter to the dry ingredients. Using a pastry cutter or your fingertips, work the butter into the flour mixture until it resembles coarse crumbs. You want small pea-sized pieces of butter for the flakiness that we’re after.
- Add the Milk: Gradually pour in the milk, stirring gently until the dough comes together. Don’t overmix—just combine until there are no dry spots. If the dough feels too sticky, add a little more flour.
3rd step: Prepare the Filling
- Choose Your Filling: If you’re making the berry filling, toss the berries with a tablespoon of sugar and set aside. For chocolate filling, simply measure out your chocolate chips. For custard, ensure it’s ready to go. For savory, mix the chicken with the soup and veggies in a bowl.
- Let It Rest: Allow the filling to sit for about 10 minutes to marinate, especially if you’re using berries. This helps enhance the flavor.
4th step: Assemble the Biscuit Pie
- Roll Out the Dough: Lightly flour a clean surface and turn out your biscuit dough. Gently roll it out into a rectangle about 1/2 inch thick. Aim for a size that can cover your pie dish completely.
- Line the Pie Dish: Carefully transfer half of the rolled-out dough to a greased 9-inch pie dish. Press it into the dish gently, making sure it covers the bottom and sides.
- Add the Filling: Pour your chosen filling into the biscuit-lined pie dish. Spread it evenly to ensure every slice has a delicious bite.
- Top with Remaining Dough: Roll out the remaining dough and place it over the filling. Seal the edges by pressing them together. You can crimp the edges with a fork for a pretty finish or just press them together with your fingers.
- Cut Slits: Using a sharp knife, cut a few slits in the top crust to allow steam to escape. This will help your Biscuit Pie cook evenly and not become soggy.
5th step: Bake the Pie
- Egg Wash: Brush the top crust with the beaten egg. This gives the pie a lovely golden color as it bakes.
- Bake: Place your pie in the preheated oven and bake for 25-30 minutes, or until the top is golden brown and the filling is bubbly. Keep an eye on it during the last few minutes to avoid over-browning.
- Cool: Once baked, remove the pie from the oven and let it cool for about 10-15 minutes. This allows the filling to set a bit, making it easier to slice.
6th step: Serve
- Slice and Serve: Use a sharp knife to cut the pie into wedges. Serve warm, optionally topped with a dusting of powdered sugar or a scoop of vanilla ice cream for an extra indulgent treat.
- Enjoy: Sit back, relax, and enjoy this delicious creation with your loved ones. The warm, flaky crust combined with your choice of filling is bound to be a hit!
How to Serve
Here are some serving suggestions to elevate your Biscuit Pie experience:
- Top it Off: Serve warm slices with a scoop of vanilla ice cream or whipped cream for an extra touch of sweetness.
- Pair with Coffee: Enjoy a slice with a warm cup of coffee or tea for a delightful afternoon treat.
- Fresh Fruit: Accompany the pie with a side of fresh fruit or a simple fruit salad for a refreshing contrast to the richness of the pie.
Additional Tips
To ensure your Biscuit Pie turns out perfectly every time, here are some helpful tips:
- Chill Your Butter: Cold butter is crucial for a flaky crust. If your kitchen is warm, consider chilling the flour and mixing bowl as well.
- Don’t Overmix: When combining the dough, mix just until it comes together. Overworking it can result in tough biscuits.
- Experiment with Fillings: Feel free to get creative with your fillings! Try using different fruits, chocolate, or even a savory mix of veggies and cheese.
- Adjust Baking Time: Ovens can vary, so keep an eye on your pie. If the crust browns too quickly, cover it loosely with aluminum foil during baking.
- Storage: Store any leftovers in an airtight container at room temperature for up to two days. You can also freeze individual slices for later enjoyment!
Recipe Variations
One of the best things about Biscuit Pie is its versatility! Here are some fun variations you can try:
- Savory Biscuit Pie: Replace sweet fillings with cooked vegetables, cheese, and herbs for a delicious savory pie. Think of combinations like spinach and feta or chicken and broccoli!
- Chocolate Hazelnut: Spread a layer of chocolate hazelnut spread on the bottom crust before adding the filling for a rich, indulgent twist.
- Berry Bliss: Mix different berries for a mixed berry filling, and add a splash of lemon juice for brightness.
- Pumpkin Spice: For a seasonal twist, use pumpkin puree mixed with spices like cinnamon and nutmeg as a filling for a delightful fall dessert.
- Apple Cinnamon: Dice apples and toss them with cinnamon and sugar for a warm, comforting filling that’s perfect any time of year.
FAQ (Frequently Asked Questions)
1. Can I use store-bought biscuit dough for this recipe?
Yes! If you’re short on time or prefer convenience, you can use store-bought biscuit dough. Just follow the instructions on the packaging for rolling out and baking. The flavor will be slightly different, but it will still be delicious!
2. What can I substitute for milk in the biscuit dough?
If you need a dairy-free option, you can substitute milk with almond milk, soy milk, or oat milk. Each of these alternatives will work well and still provide a nice texture to the dough.
3. Can I make Biscuit Pie ahead of time?
Yes! You can prepare the biscuit dough and filling in advance. Assemble the pie and cover it tightly with plastic wrap, then refrigerate it for up to 24 hours before baking. When ready to bake, just remove it from the fridge and bake as directed, adding a few extra minutes if it’s cold.
4. How do I store leftovers?
Store any leftover Biscuit Pie in an airtight container at room temperature for up to two days. If you want to keep it longer, you can freeze individual slices. Just wrap them tightly in plastic wrap and place them in a freezer-safe container. They will keep well for up to three months.
5. What fillings work best for Biscuit Pie?
You can use a wide variety of fillings! Some popular choices include fresh or frozen fruits (like berries or apples), chocolate chips, vanilla custard, or even savory mixtures with chicken and vegetables. Feel free to experiment and find your favorite combination!
6. Can I make this recipe gluten-free?
Absolutely! To make a gluten-free Biscuit Pie, use a gluten-free all-purpose flour blend in place of regular flour. Ensure the other ingredients (like baking powder) are also gluten-free.
7. What should I do if my biscuit crust is too thick?
If you find your biscuit crust is too thick, it may be helpful to roll it out more evenly. Aim for about 1/2 inch thick. If it’s still thick after baking, you can try using a thinner layer of dough next time or adjust the baking time to ensure the crust cooks through.
8. How can I make my Biscuit Pie more visually appealing?
To enhance the appearance of your Biscuit Pie, consider adding decorative slits in the top crust, crimping the edges, or brushing the top with a little extra egg wash. You can also sprinkle coarse sugar on top before baking for a beautiful, sparkling finish!
9. Can I use a different size pie dish?
Yes! You can use a different size pie dish, but keep in mind that the baking time may vary. If you use a larger dish, the pie may bake faster, while a smaller dish may take longer. Keep an eye on the pie and adjust the baking time as needed.
10. What drinks pair well with Biscuit Pie?
Biscuit Pie pairs wonderfully with a variety of beverages! For a sweet treat, try serving it with coffee, tea, or a glass of milk. For a more festive occasion, consider pairing it with a dessert wine or sparkling cider.
Print
Biscuit Pie
- Total Time: 1 hour
Ingredients
Here’s what you’ll need to make your own Biscuit Pie:
- For the Biscuit Crust:
- 2 cups all-purpose flour
- 1 tablespoon baking powder
- 1/2 teaspoon salt
- 1/4 cup granulated sugar
- 1/2 cup unsalted butter, cold and cubed
- 3/4 cup milk
- For the Filling (choose one or mix them!):
- Berry Filling: 2 cups fresh or frozen mixed berries (strawberries, blueberries, raspberries)
- Chocolate Filling: 1 cup chocolate chips
- Custard Filling: 2 cups prepared vanilla custard
- Savory Filling: 1 cup cooked chicken, shredded, mixed with 1/2 cup cream of chicken soup and 1/2 cup frozen mixed vegetables
- For Topping:
- 1 egg, beaten (for egg wash)
- Optional: powdered sugar for dusting
Instructions
Step 1: Preheat the Oven
Preheat your oven to 425°F (220°C). A hot oven is essential for achieving that perfectly golden biscuit crust.
Step 2: Make the Biscuit Dough
- Mix Dry Ingredients: In a large mixing bowl, combine the flour, baking powder, salt, and sugar. Stir until well combined. This is the foundation of your biscuit pie, so make sure the ingredients are evenly mixed.
- Cut in the Butter: Add the cold, cubed butter to the dry ingredients. Using a pastry cutter or your fingertips, work the butter into the flour mixture until it resembles coarse crumbs. You want small pea-sized pieces of butter for the flakiness that we’re after.
- Add the Milk: Gradually pour in the milk, stirring gently until the dough comes together. Don’t overmix—just combine until there are no dry spots. If the dough feels too sticky, add a little more flour.
Step 3: Prepare the Filling
- Choose Your Filling: If you’re making the berry filling, toss the berries with a tablespoon of sugar and set aside. For chocolate filling, simply measure out your chocolate chips. For custard, ensure it’s ready to go. For savory, mix the chicken with the soup and veggies in a bowl.
- Let It Rest: Allow the filling to sit for about 10 minutes to marinate, especially if you’re using berries. This helps enhance the flavor.
Step 4: Assemble the Biscuit Pie
- Roll Out the Dough: Lightly flour a clean surface and turn out your biscuit dough. Gently roll it out into a rectangle about 1/2 inch thick. Aim for a size that can cover your pie dish completely.
- Line the Pie Dish: Carefully transfer half of the rolled-out dough to a greased 9-inch pie dish. Press it into the dish gently, making sure it covers the bottom and sides.
- Add the Filling: Pour your chosen filling into the biscuit-lined pie dish. Spread it evenly to ensure every slice has a delicious bite.
- Top with Remaining Dough: Roll out the remaining dough and place it over the filling. Seal the edges by pressing them together. You can crimp the edges with a fork for a pretty finish or just press them together with your fingers.
- Cut Slits: Using a sharp knife, cut a few slits in the top crust to allow steam to escape. This will help your Biscuit Pie cook evenly and not become soggy.
Step 5: Bake the Pie
- Egg Wash: Brush the top crust with the beaten egg. This gives the pie a lovely golden color as it bakes.
- Bake: Place your pie in the preheated oven and bake for 25-30 minutes, or until the top is golden brown and the filling is bubbly. Keep an eye on it during the last few minutes to avoid over-browning.
- Cool: Once baked, remove the pie from the oven and let it cool for about 10-15 minutes. This allows the filling to set a bit, making it easier to slice.
Step 6: Serve
- Slice and Serve: Use a sharp knife to cut the pie into wedges. Serve warm, optionally topped with a dusting of powdered sugar or a scoop of vanilla ice cream for an extra indulgent treat.
- Enjoy: Sit back, relax, and enjoy this delicious creation with your loved ones. The warm, flaky crust combined with your choice of filling is bound to be a hit!
- Prep Time: 30 minutes
Nutrition
- Serving Size: 10
- Calories: 350
- Fat: 15g
- Carbohydrates: 50g
- Protein: 6g
Conclusion
Biscuit Pie is more than just a dessert; it’s a delicious way to create memories with loved ones around the table. With its flaky crust and endless filling options, it’s a dish that can adapt to any occasion or craving. From cozy family dinners to festive celebrations, Biscuit Pie is sure to impress.
So, whether you’re a seasoned baker or a kitchen novice, don’t hesitate to give this recipe a try. I promise you’ll be rewarded with a dessert that’s as comforting as it is delicious. Now, gather your ingredients, roll up your sleeves, and let’s get baking! Your Biscuit Pie masterpiece awaits, and I can’t wait to hear how it turns out.
Final Thoughts
I hope you enjoy making and sharing this Biscuit Pie with your friends and family. Remember, the best meals are those shared with loved ones, and nothing beats the joy of homemade treats. So go ahead, get creative with your fillings, and make this recipe your own! Don’t forget to take a moment to savor the process and enjoy every delicious bite. Happy baking!


